Configuring SSO using SAML & Entra ID
Top Level Process Overview:: You need to register the connection on both systems (Dynasend is one system and Entra ID is the other system). Both systems will generate a certificate that you then need to copy/paste to the other system. Authentication messages are then signed with these certificates to confirm their authenticity.
How to Use These Instructions: Please don’t take every screen-capture and statement literally. This is a slightly complex back-and-forth process. The instructions should illustrate everything that you need to accomplish – exactly how you go about it is left to your best judgement.
Note #1: Provisioning an AD sync to Dynasend is required. If you don’t have this set up, please contact Dynasend to request this.
Note #2: You’ll need “developer” credentials from Dynasend to proceed. If you don’t have these, please contact Dynasend and request them (for the person who will be completing this process).
Start here in Dynasend’s dashboard:
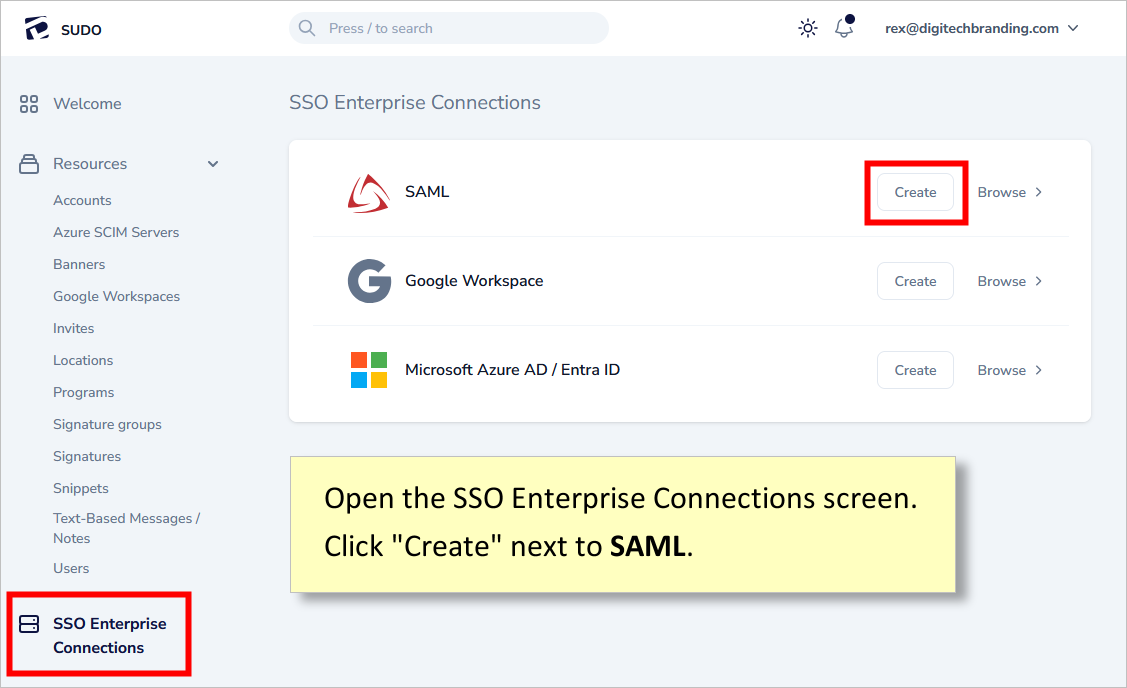
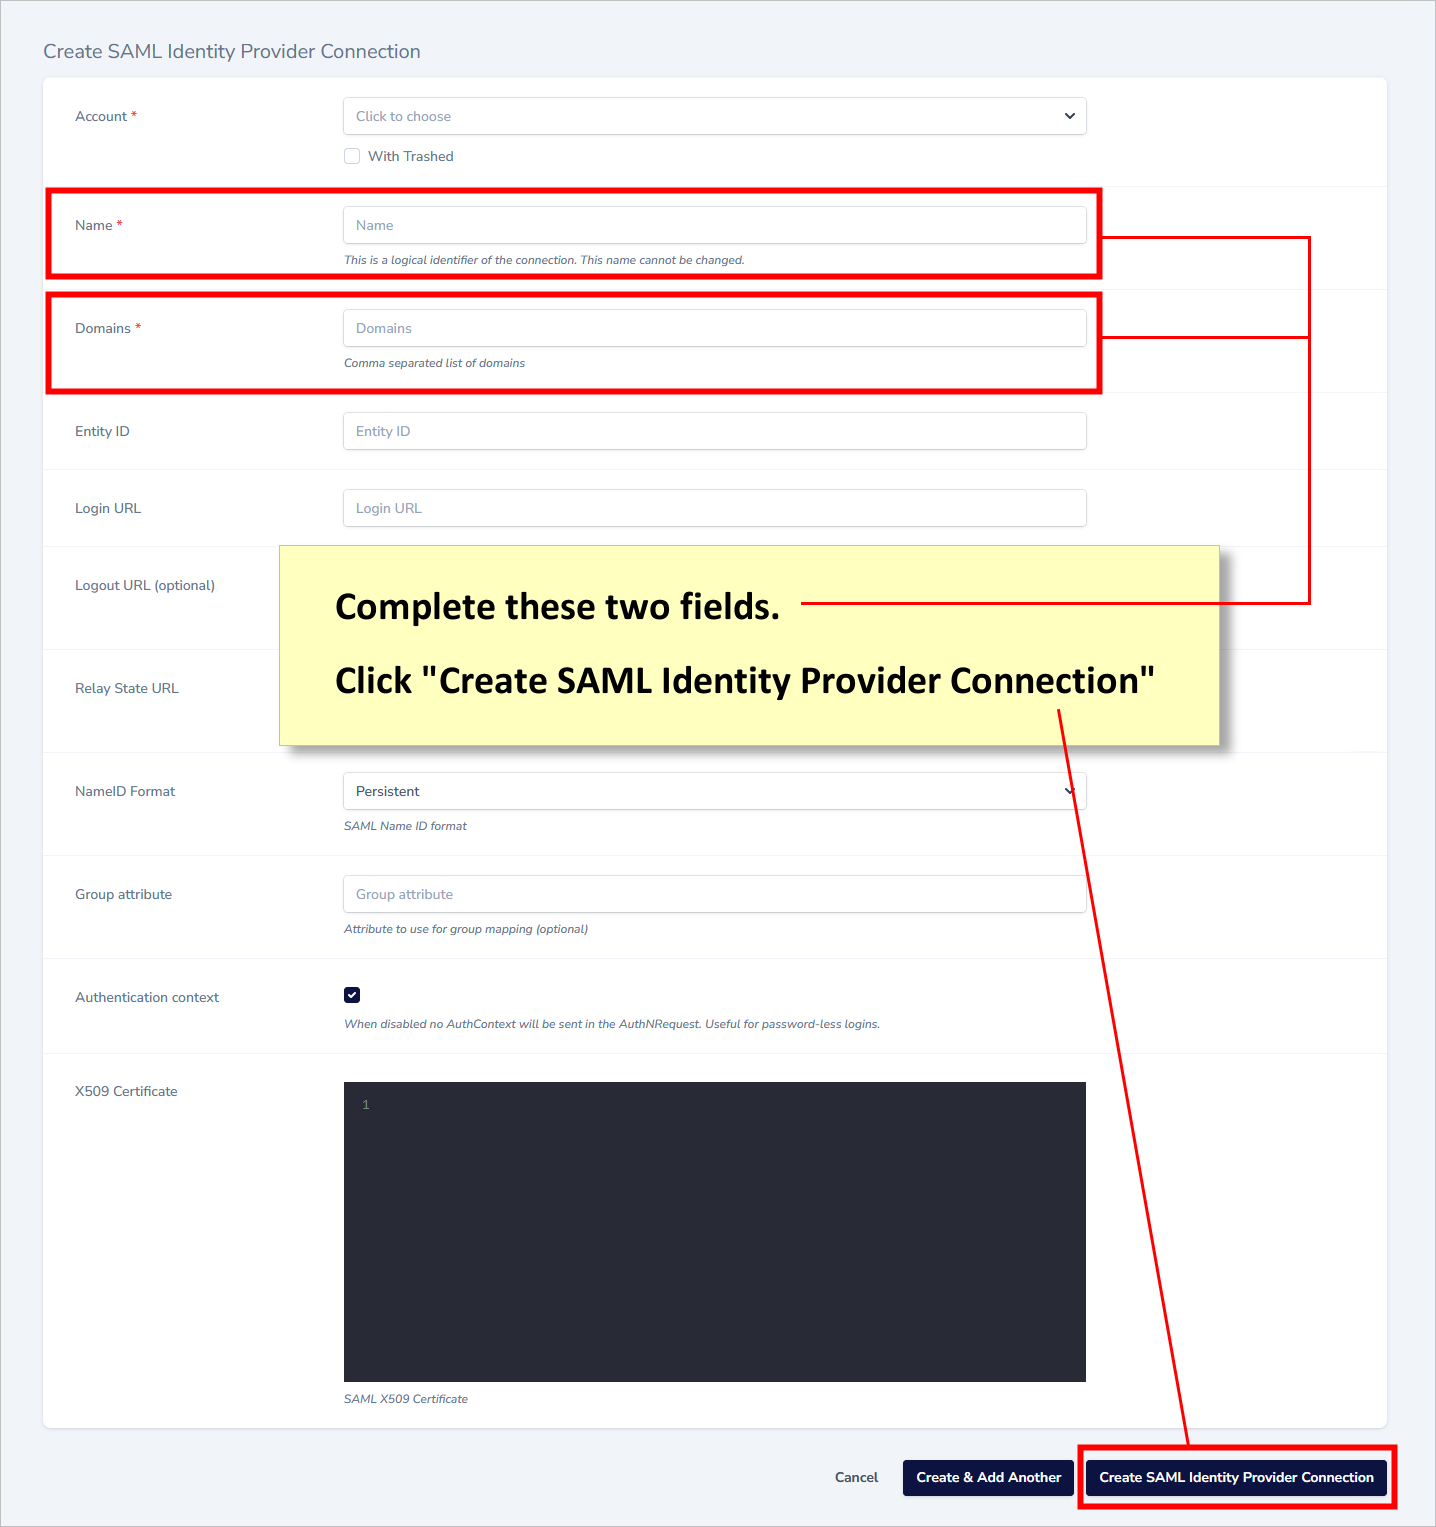
You’ll then see the following screen:
- you can fill out the name and domain fields
- click the “Create SAML Identity Provider Connection” button
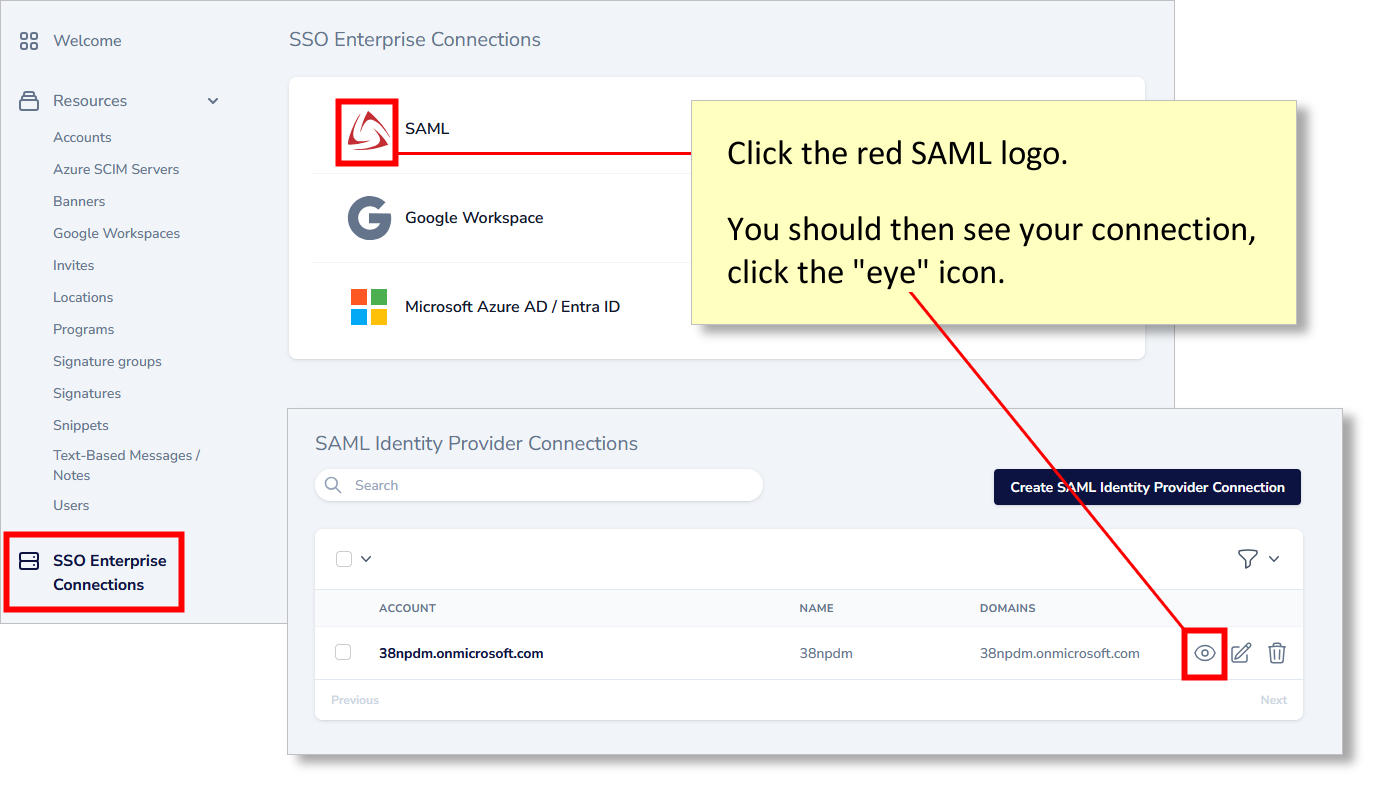
Now you’ll need to navigate back into your Dynasend SAML connection as shown here:
Scroll down to the “setup” section and take the following steps to save your SAML Metadata XML file:
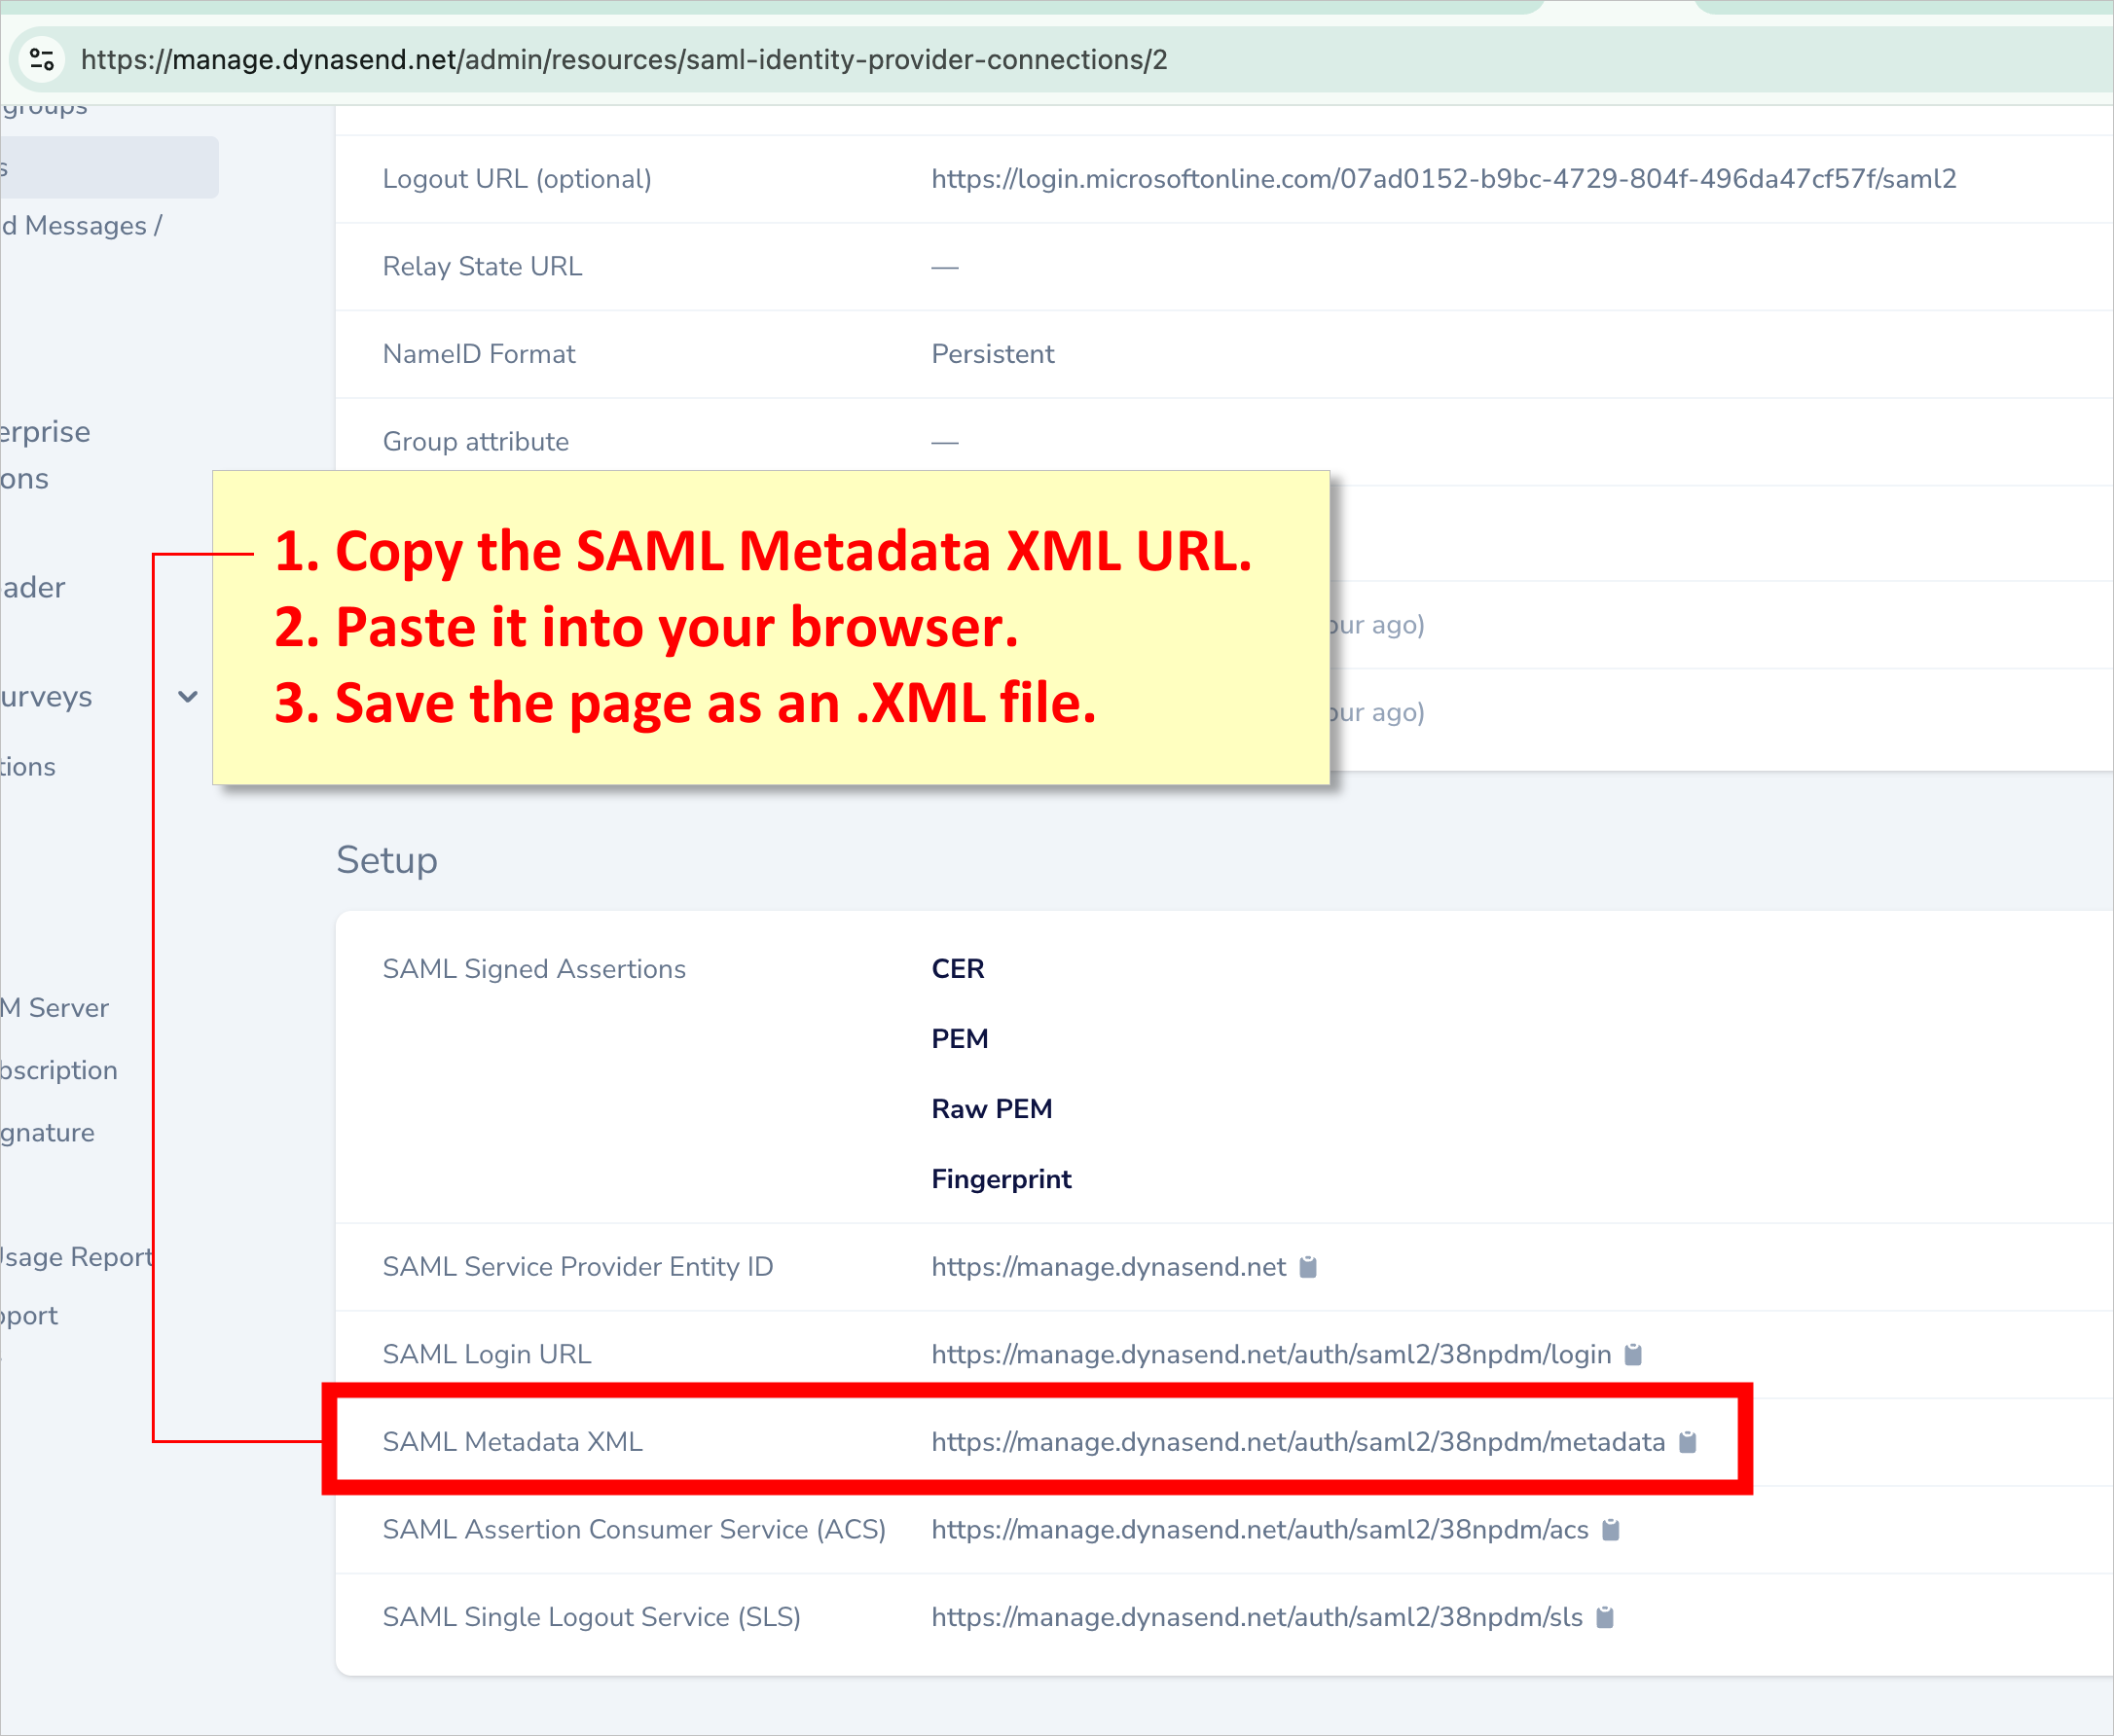
After completing this, you’ll need to shift back to the Microsoft Entra Admin Center.
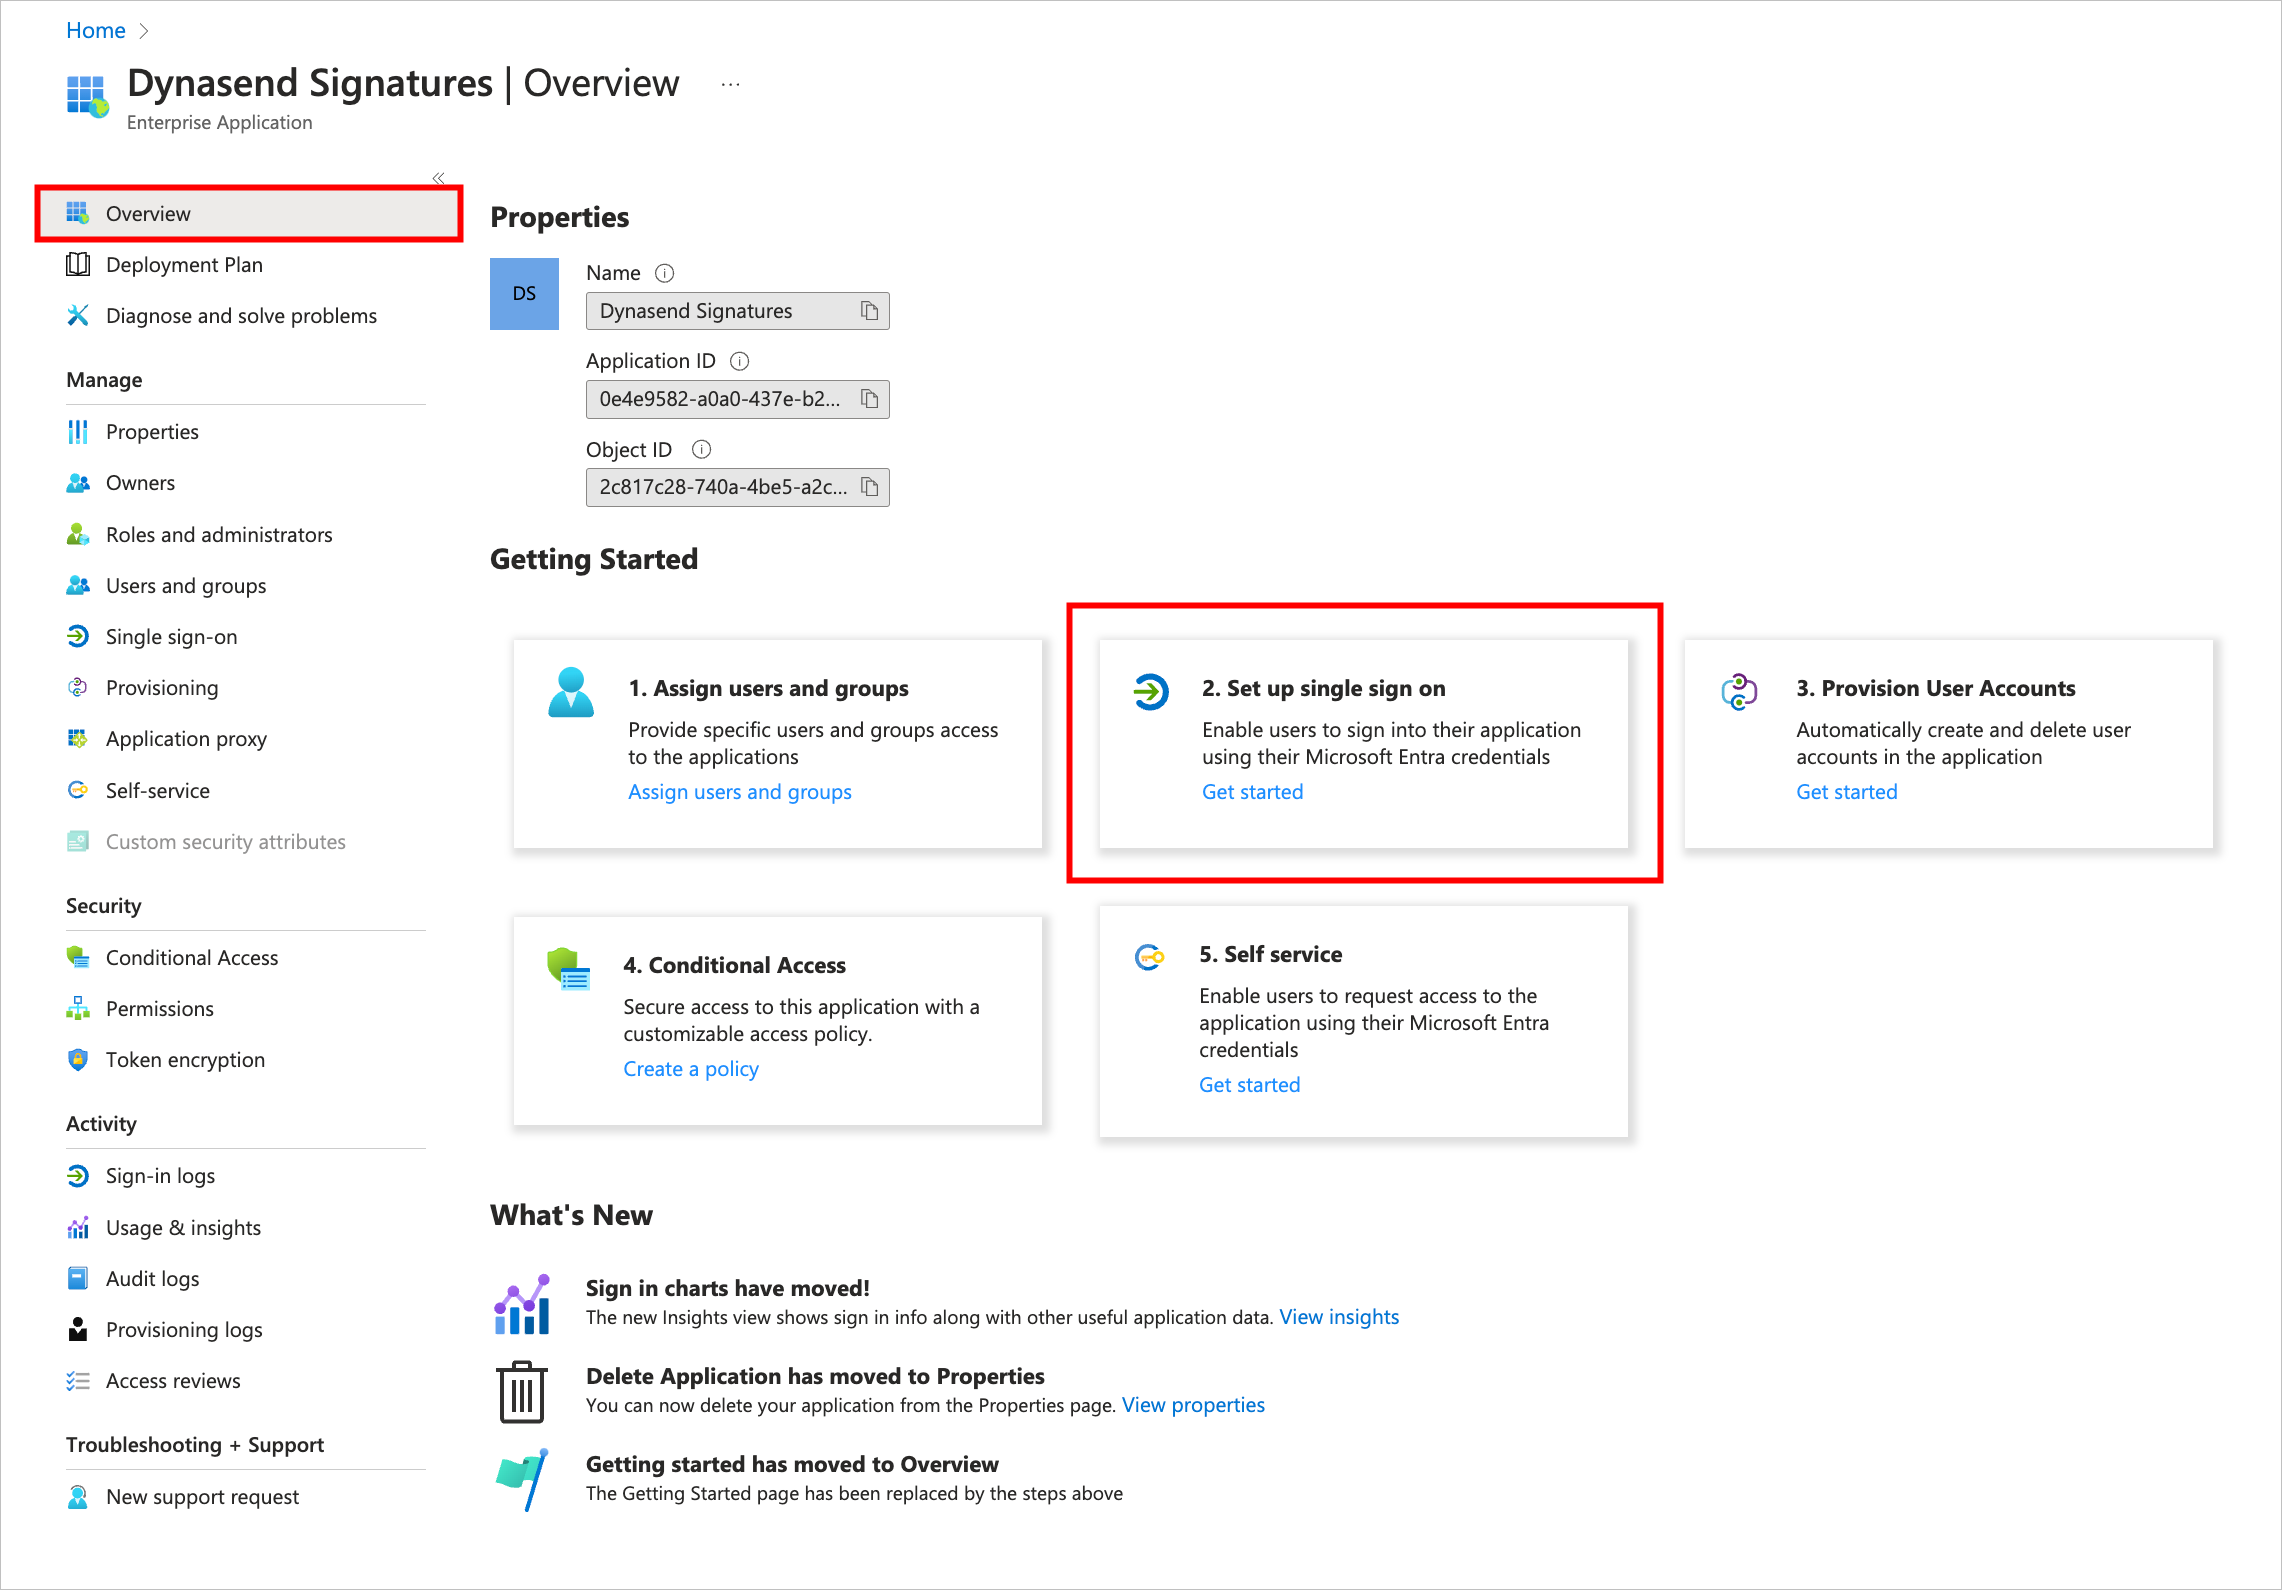
Click “Overview” on the left menu and then click the “Set up single sign on” tile:
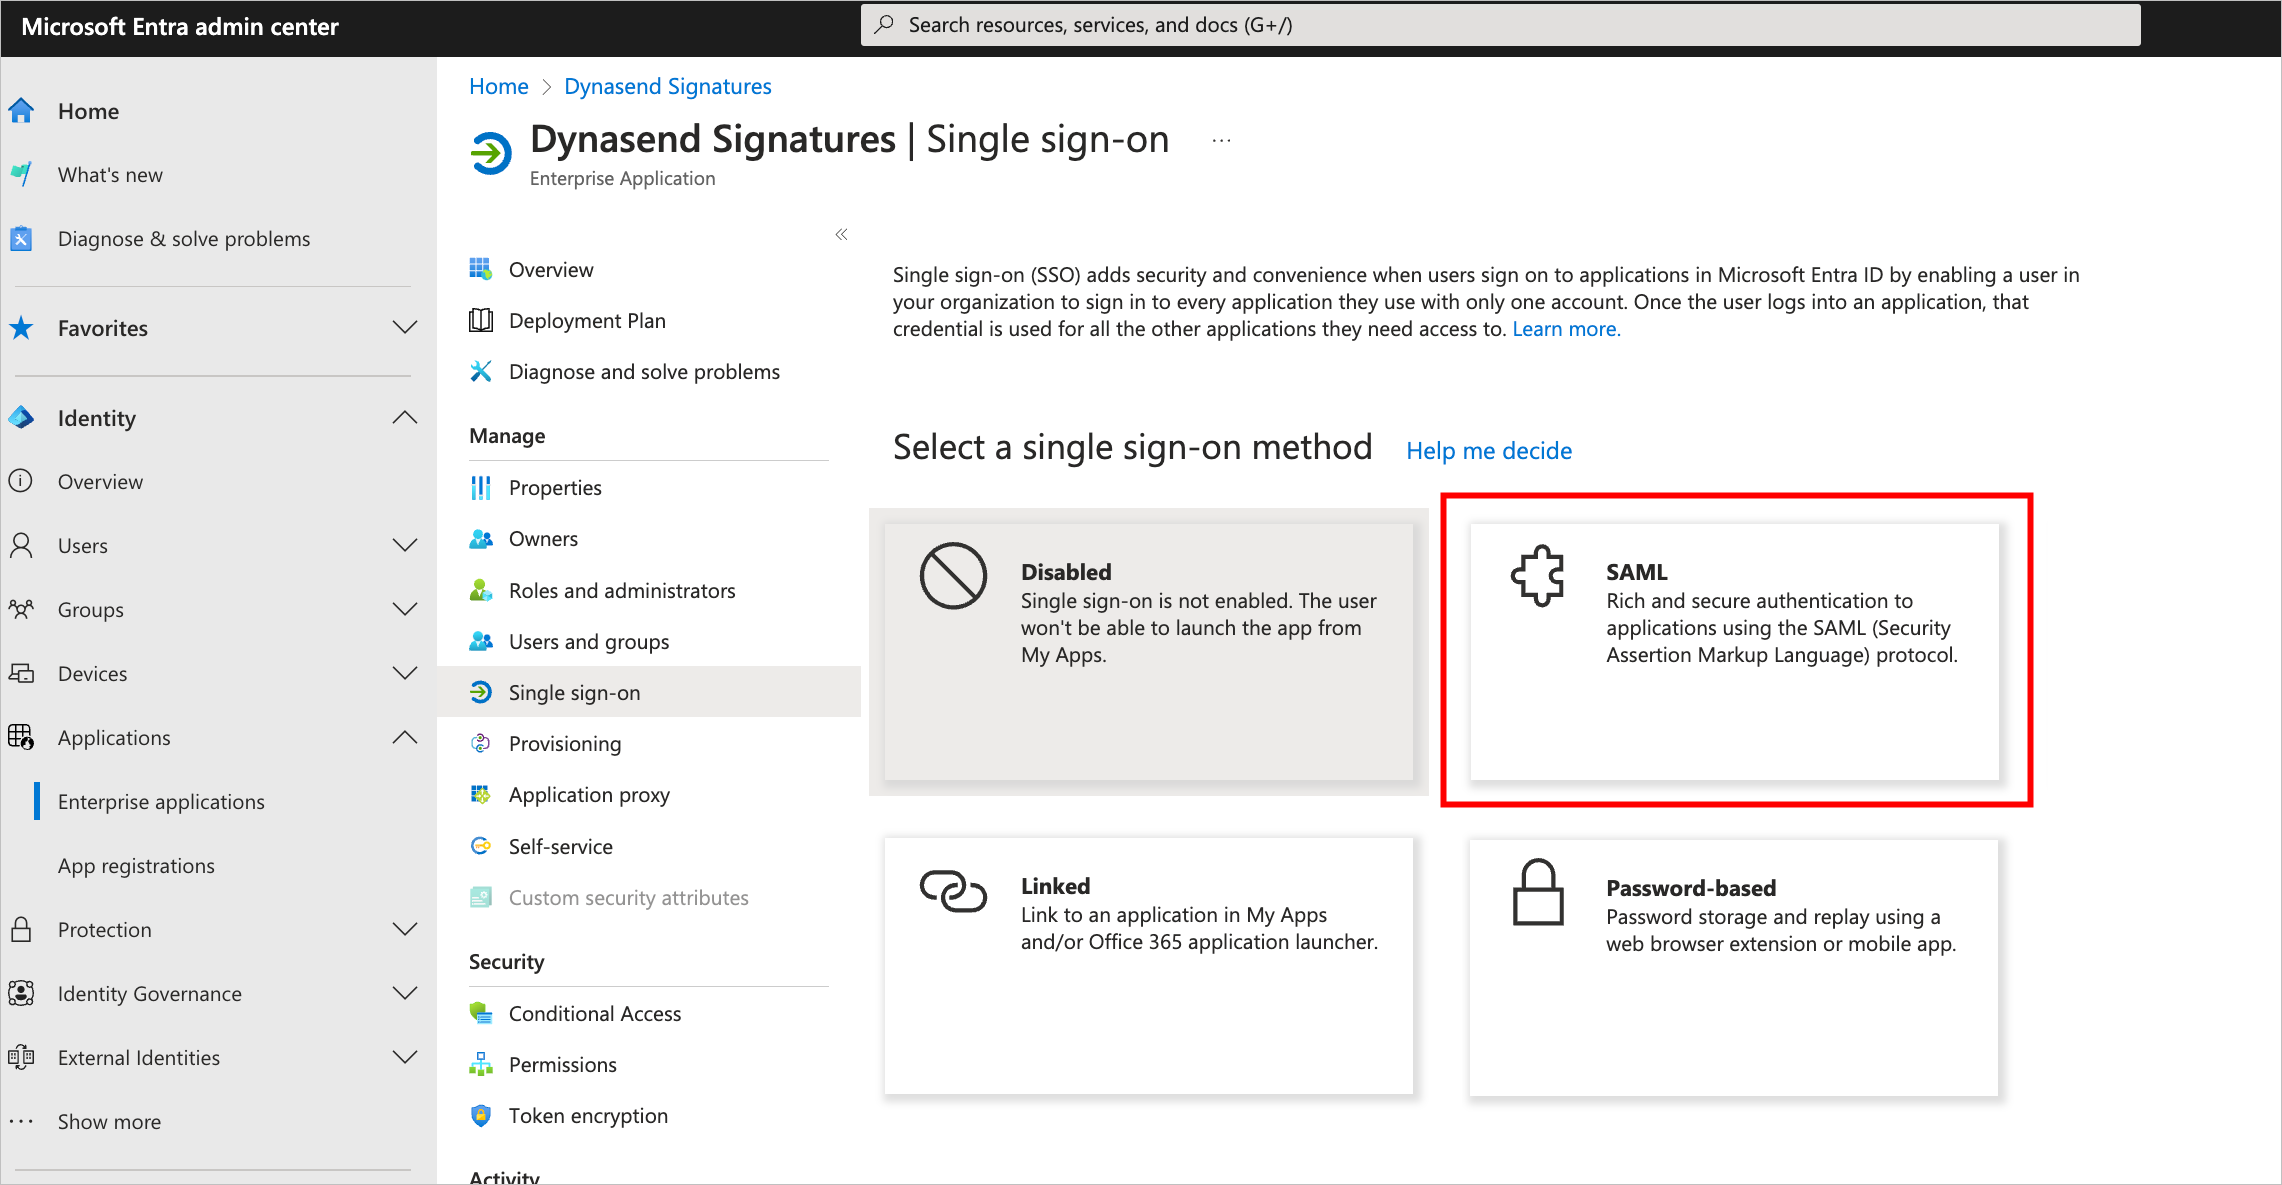
Now click the SAML tile.
From here you can upload the SAML Metadata XML file that you previously saved:
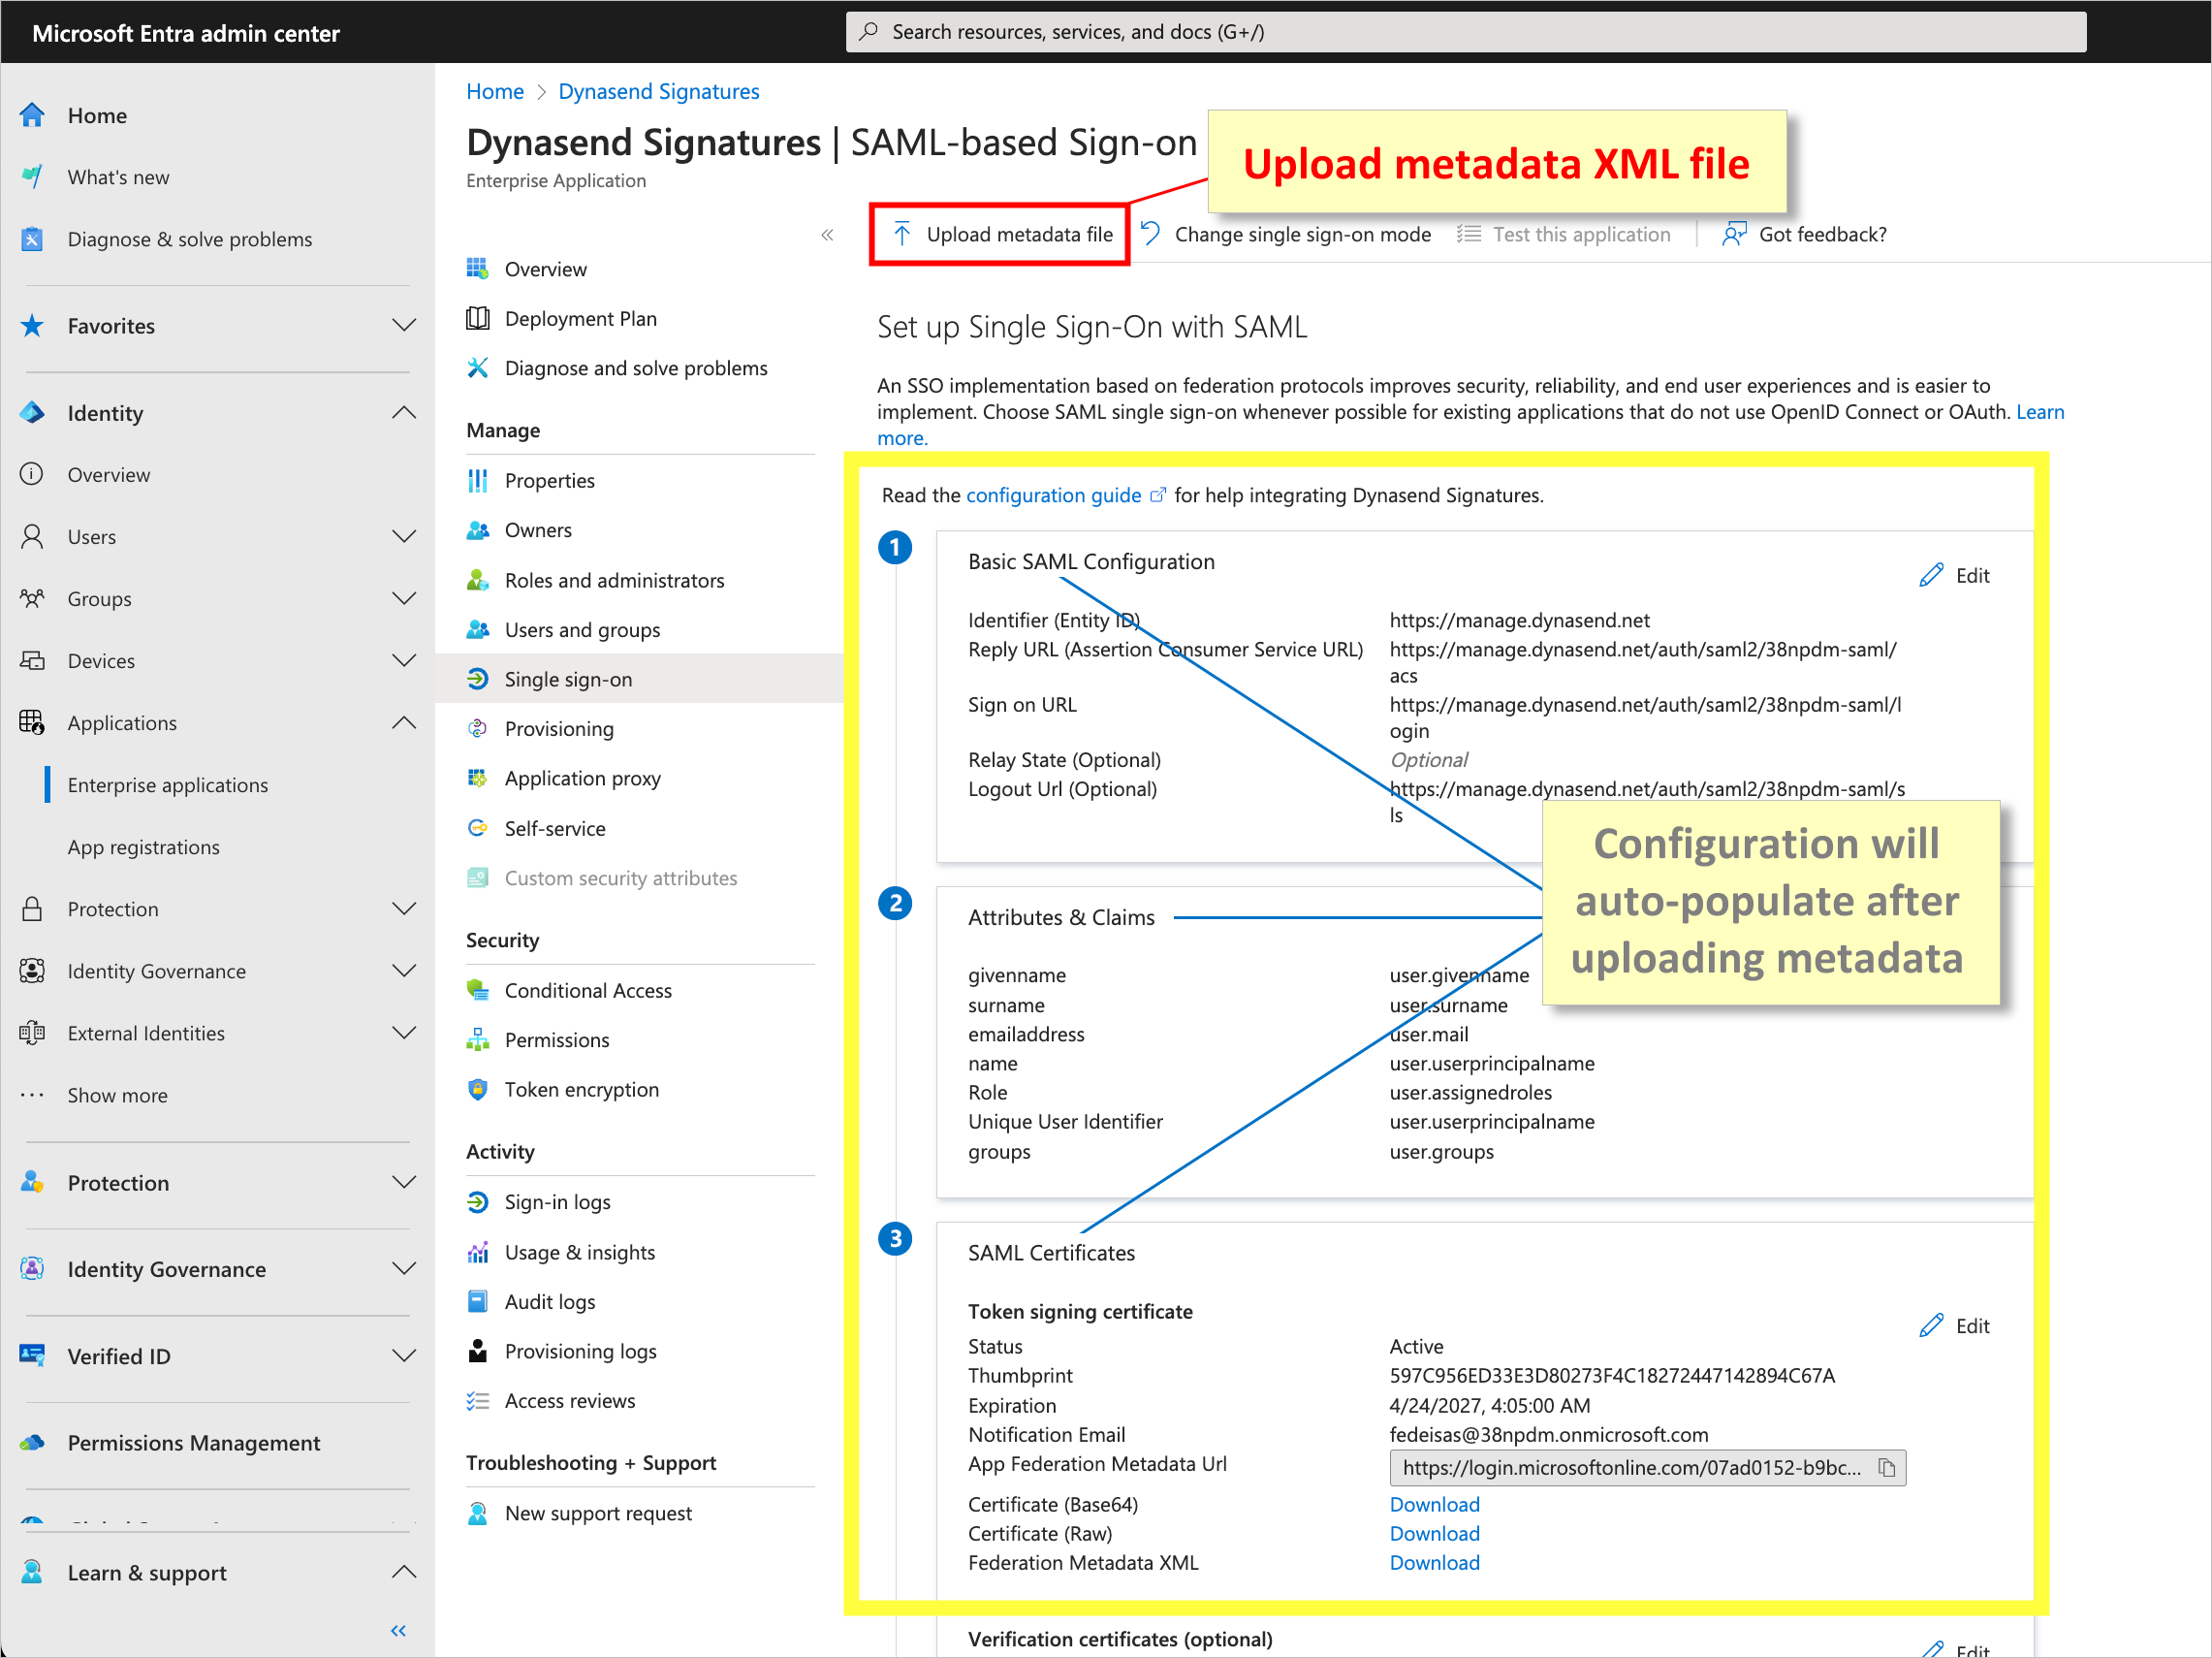
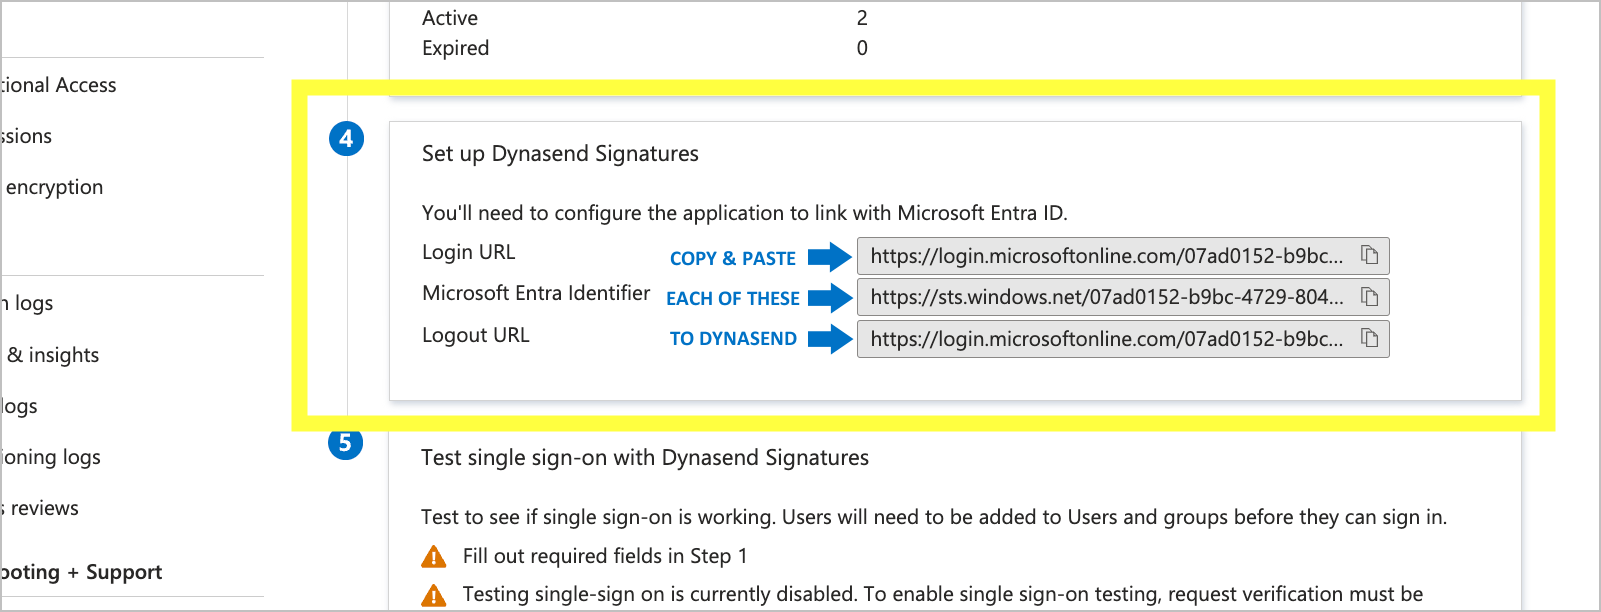
After uploading the XML file, scroll down to section 4. Here you nned to copy three URL’s that will then need to be added back in on the Dynasend side:
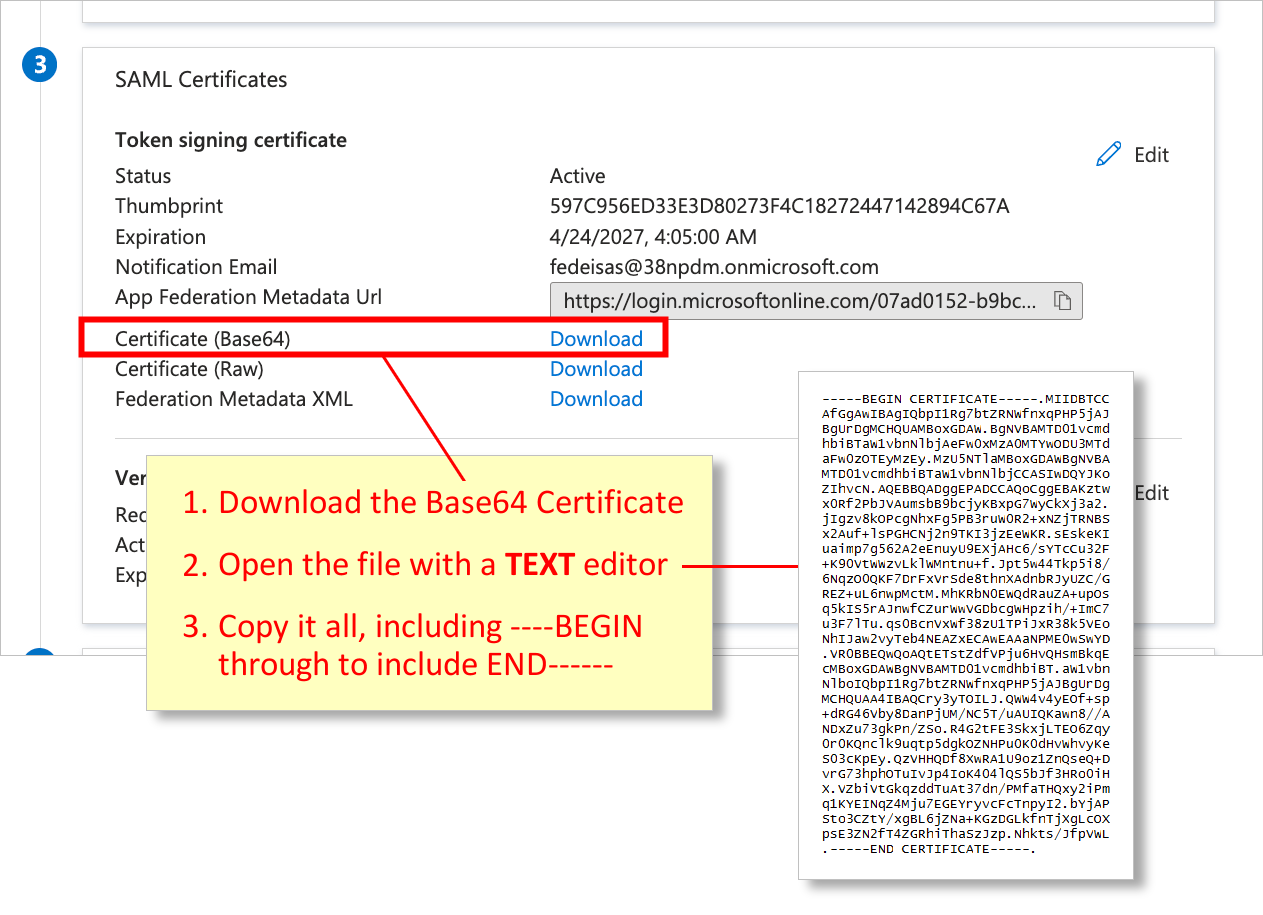
You’ll also need to download the Certificate (Base64) and save it, to copy it back into Dynasend in a moment.
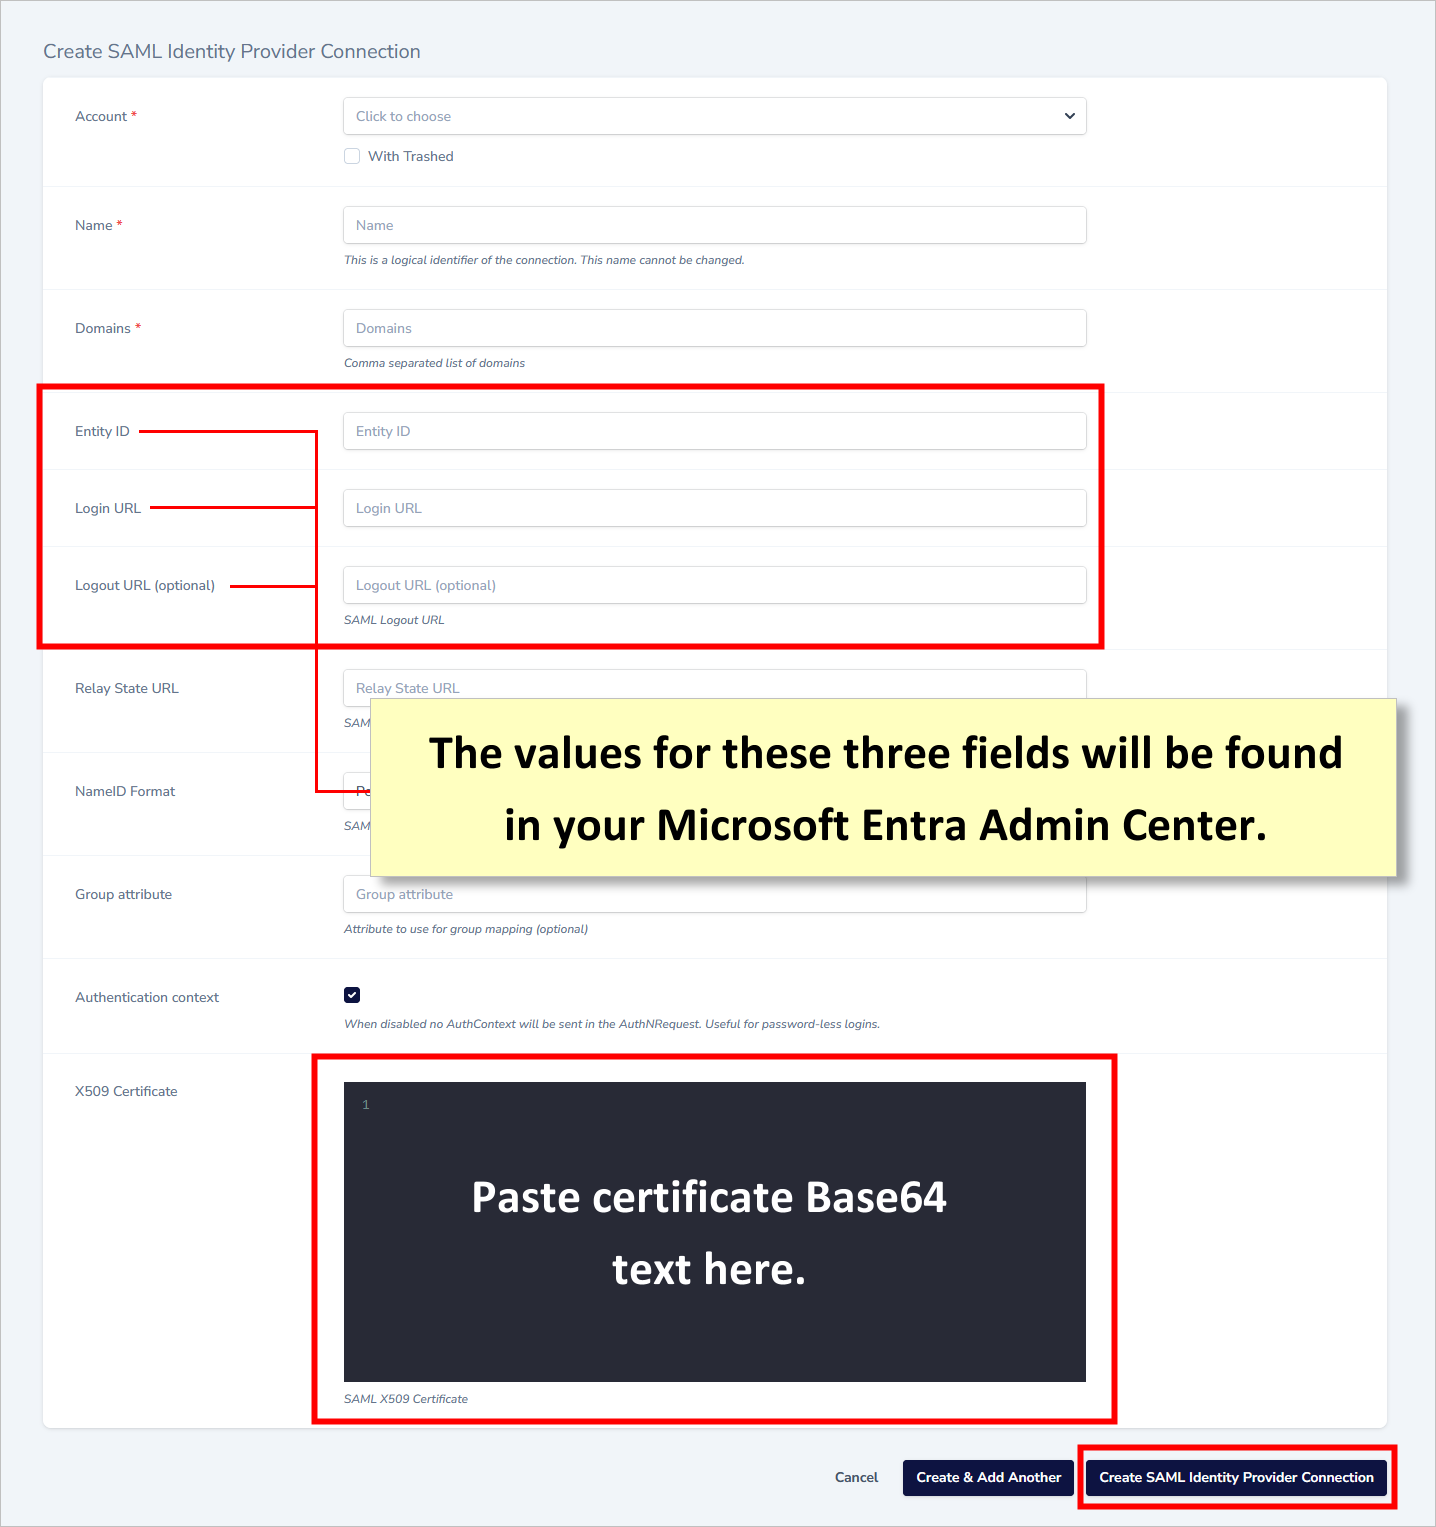
Now you can shift back to the Dynasend side, and complete the setup.
You will have the data for the three fields shown in red below.
You’ll also have the certificate (Base64) text to paste in.
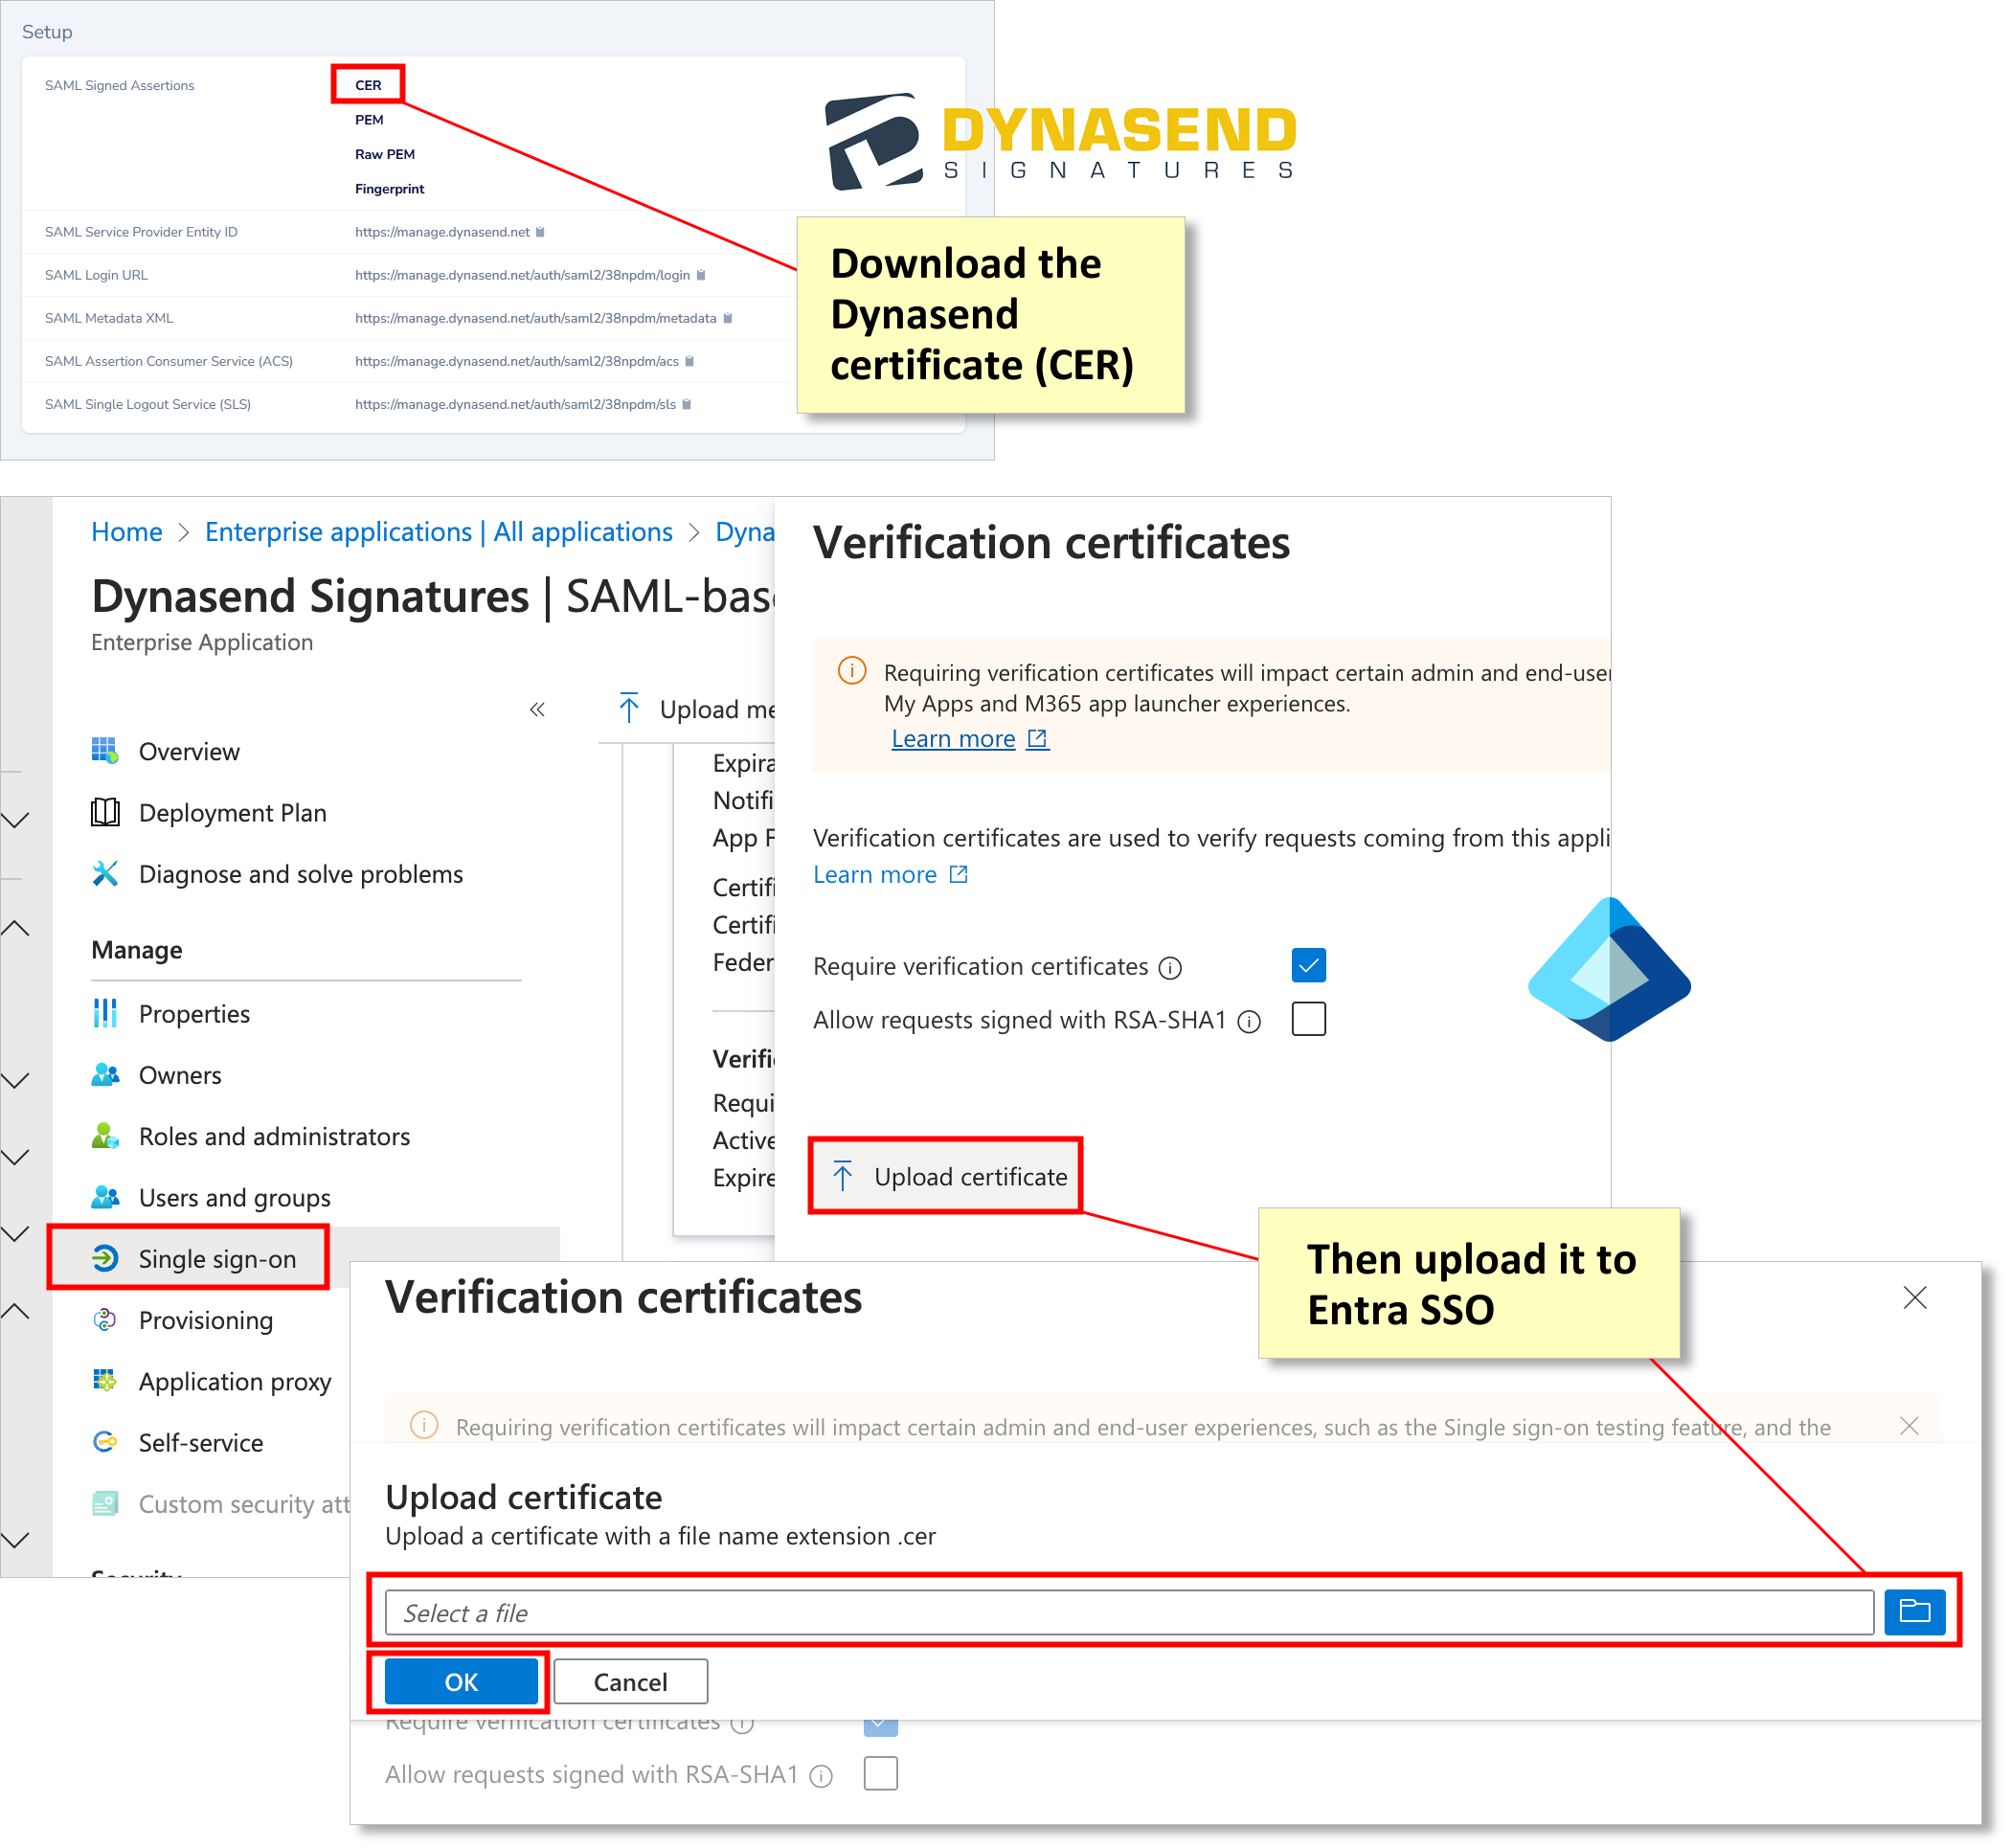
Finally, you’ll want to reverse the process and download the Dynasend CER and then upload it into your SSO configuration on the Microsoft Entra Admin Center.
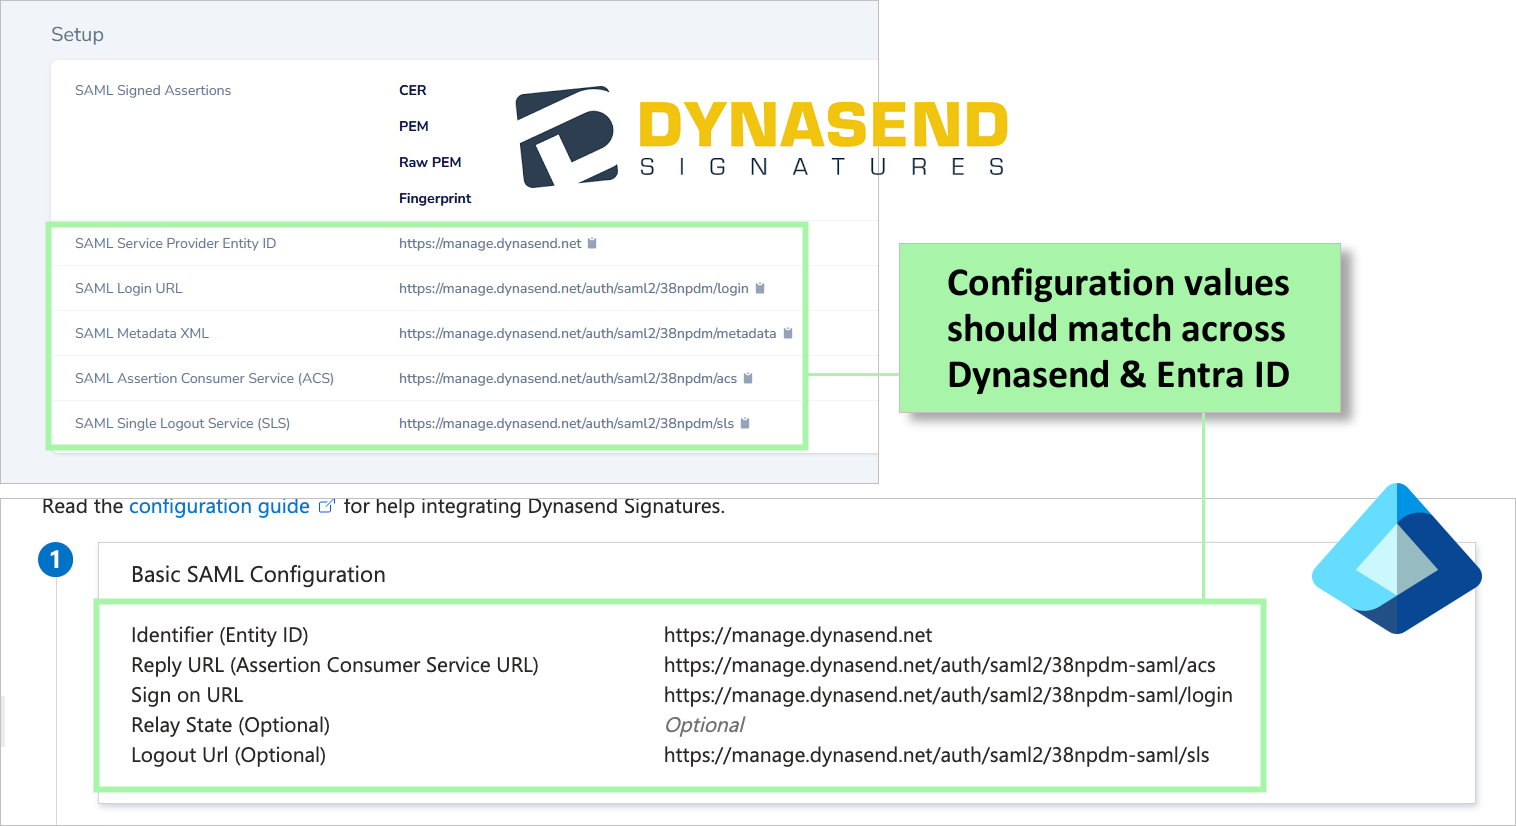
Once everything is completed, you should find that the Dynasend SSO SAML connection setup box has information that matches the information contained in the Microsoft Entra Admin Center:
