Posting the Graphic Image to a Web Server
Before applying any banner to an email signature, the graphic must be posted to a publicly accessible web server. The most direct approach is usually for you to post, or have someone else post, the graphic to your own server.
Alternatively, you may request that we post it for you. In this case you’ll need to send us the graphic, we’ll post it, and send you back the URL that you’ll need.
Using the Banner Administration Tool
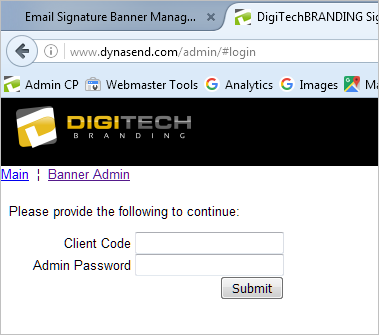
The URL you need to enter to access the tool is: https://www.dynasend.com/admin/
You will see this login dialog. (The credentials you need will have been provided to you separately.)

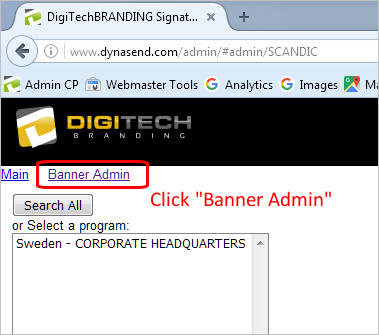
Once logged in you will need to click the “Banner Admin” link.

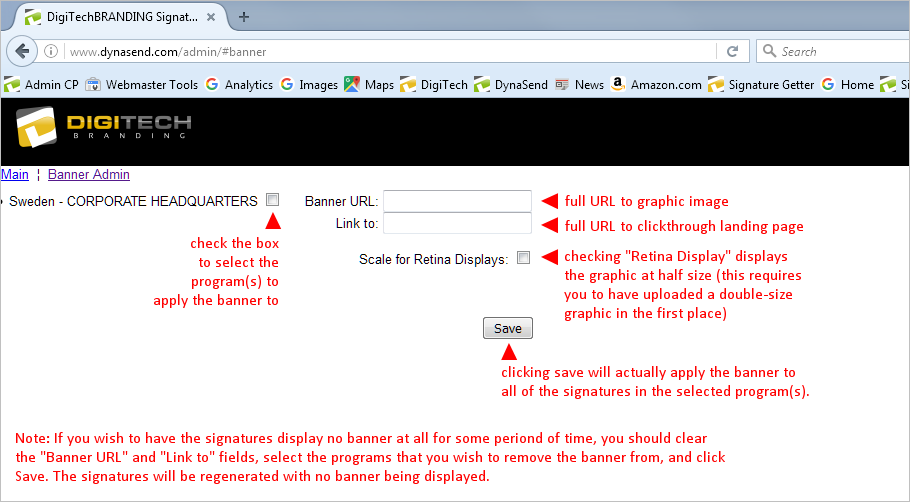
The actual banner administration is really quite simple. You will need to do the following:
- Check the box(s) that appear to the right of the email signature program(s) that you wish to apply this particular banner to.
- Enter the full URL for the location of the graphic on the web server.
- Enter the full URL for the hyperlink that you want used when someone clicks on the banner. If you do not want to hyperlink the banner you can leave this blank.
- Check the “Scale for Retina Displays” box if you posted a double-size graphic (for HD / Retina Display optimization).
- Click SAVE to apply the new banner to all the signatures in the selected program(s).
The graphic below illustrates these steps.

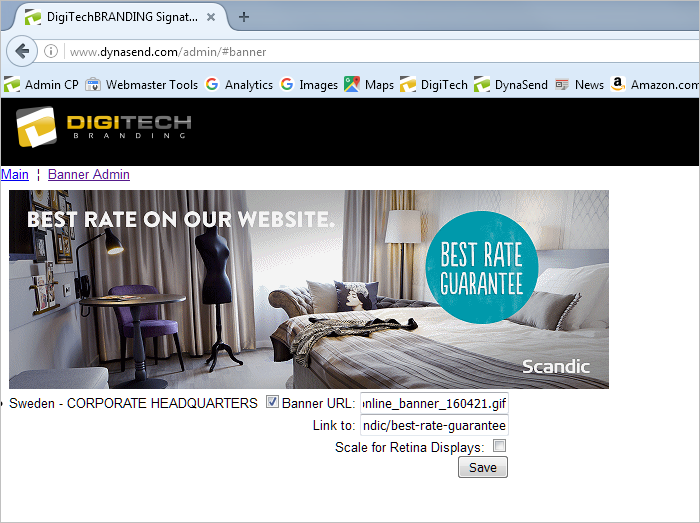
Below is an illustration of the form fully filled out. Note that the successful entry of the “Banner URL” will cause a preview of the graphic itself to appear. In this case the banner will be applied to the program called “Sweden - CORPORATE HEADQUARTERS”. The banner is not scaled for Retina Display, and the hyperlink is directed to a “best rate guarantee” landing page.

Once the process of saving is complete, just close the administrative tool (there is no “log out” functionality).