Quick Start Instructions
The quickest way to get started is to use the “Create Program from Template” option. This will provide you with the following:
- a pre-configured user data entry form / database setup with variables
- generic HTML email signature code
- generic plain-text code
- the necessary “styles” file
- pre-configured vCard mapping
These are the building blocks of your email signature program. All of them are then editable, as needed, but this quick-start process gets you 75% done with just a few clicks!
Step 1 - Create Program from Template
Here’s the process:
- navigate to your “Programs” page
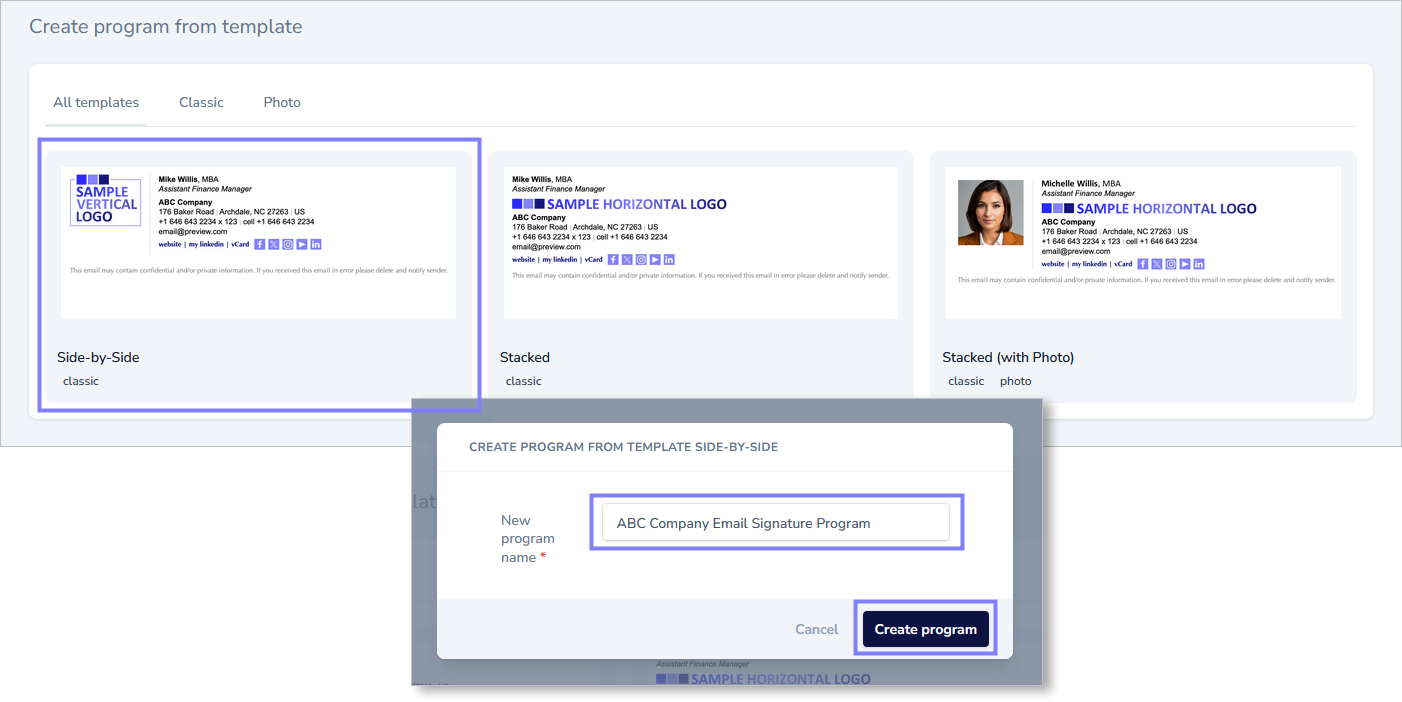
- click “Create Program from Template”

- click the tile of the layout you wish to use as your starting point
- give your new program a name
- click “Create Program”
Step 2 - Logo Image Upload
Email signatures typically include the company logo. This graphic will need to be prepared prior to uploading. Because every company logo is different, we can only provide some basic rules:
- the logo image should ideally be a transparent PNG file
- it should be exactly two times the size (in pixels) as you want it to appear in the signature
- it should be cropped tight to all four edges
- its size should be an even number of pixels (for clean division by two)
- it’s name should be in lower-case letters
Note: If you need assistance preparing the image(s) you need for your signature, please email us here and we’ll prepare it/them for you.
We cannot tell you the correct size, but a couple of rules-of-thumb to get you into the ballpark are:
- Square, circular, or vertical logo that will be used in a “side-by-side” signature layout - maybe start at 200 pixels high (to be displayed as 100 pixels high)
- Horizontal logo to be usind in a “stacked” signature layout - maybe start at 80 pixels high (to be displayed as 40 pixels high)
It’s possible that you will have to take two or three passes to adjust the logo size to your liking.
Alternative Approach to Figuring Out Logo Sizing: Here’s another approach we can suggest. Depending on which layout you will be using, copy and paste one of the two graphics below into your graphics program. With this dummy signature layout displayed at 100%, open your logo file and rezise it until it looks about right (in the place of the purple sample logo). Once you’ve found the size you like, double it and save your logo file at that size.
![]()
![]()
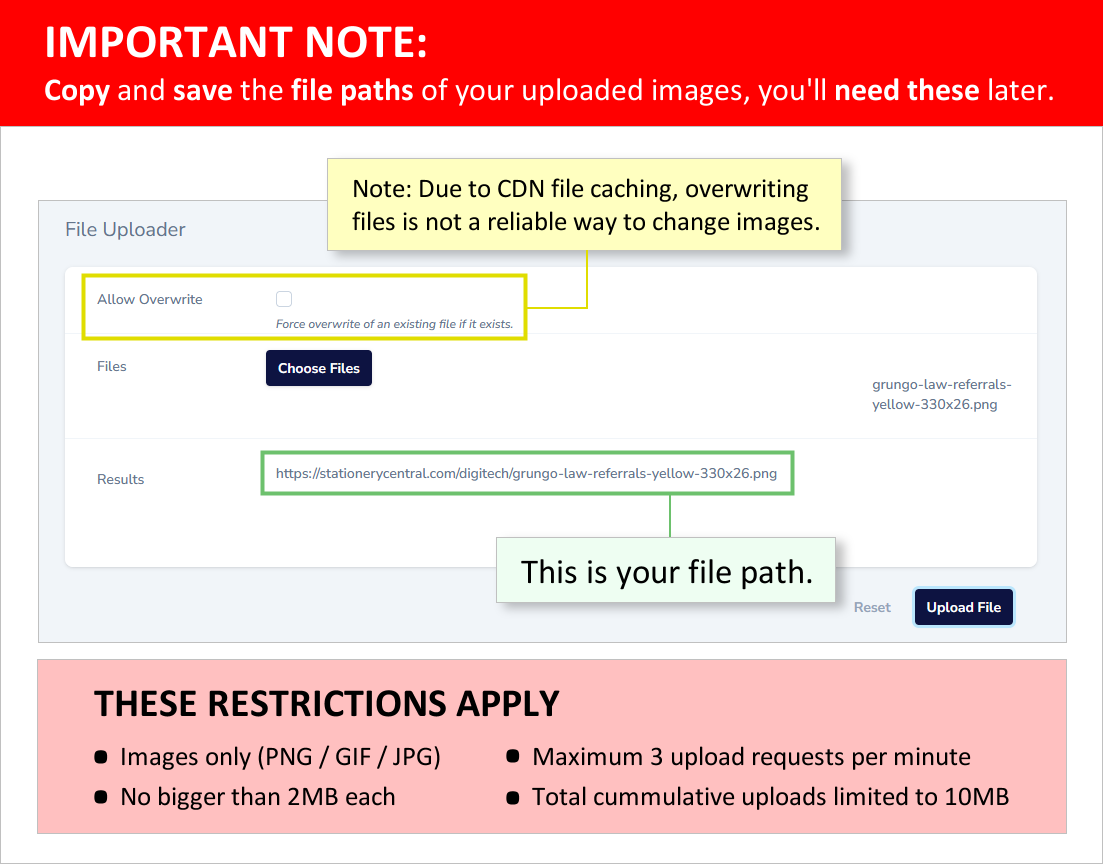
Once you’ve got your image prepared, use our uploader to upload your file.

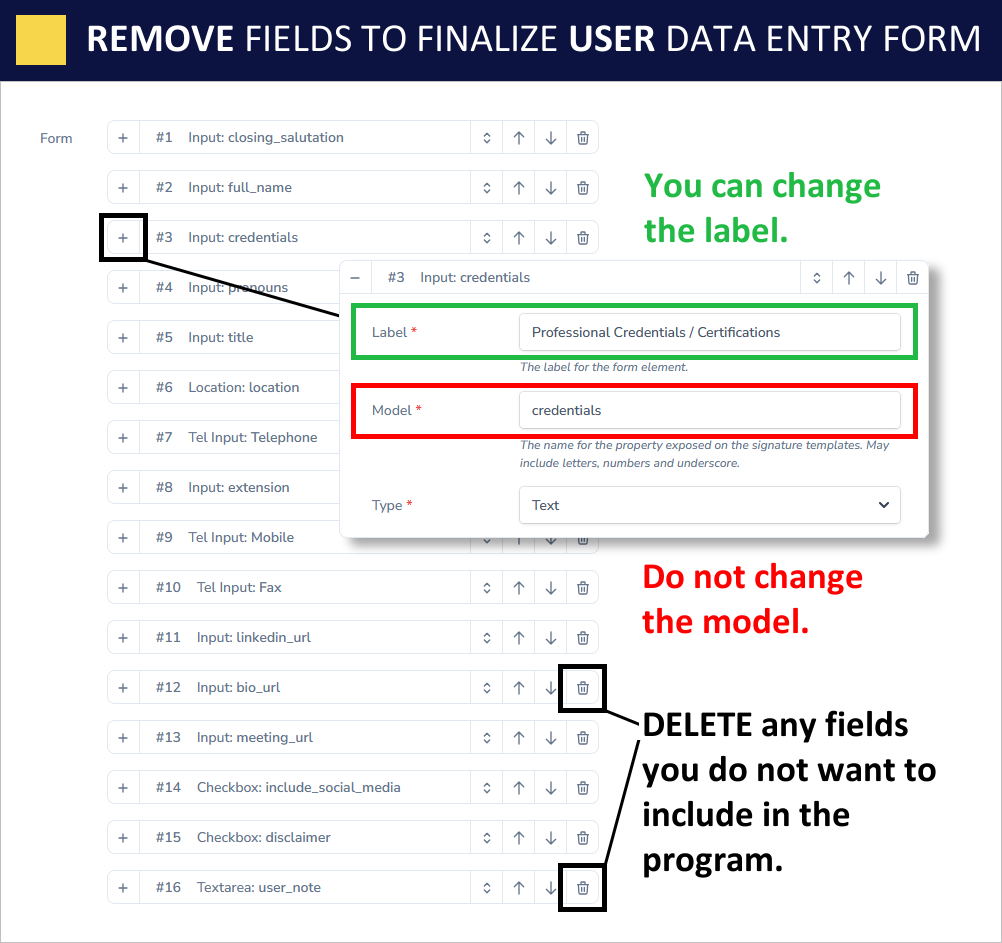
Step 3 - Edit Form
To simplify the form creation process, we begin with a large number of features and suggest that you tailor your form primarily through a process of deletion. This temds to be easier than adding fields / signature elements. Here’s what the default form looks like, before any deletions:
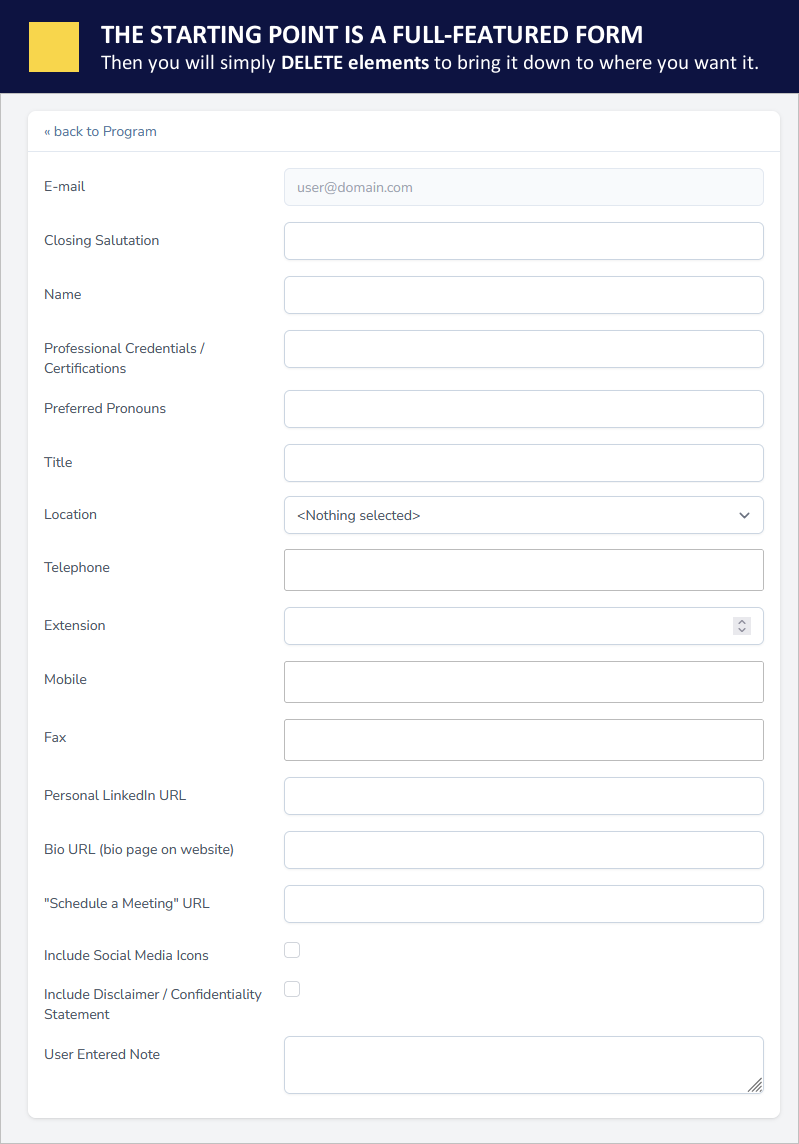
You’ll be able to edit the form and proceed with the paring-down process as illustrated in the graphics below.
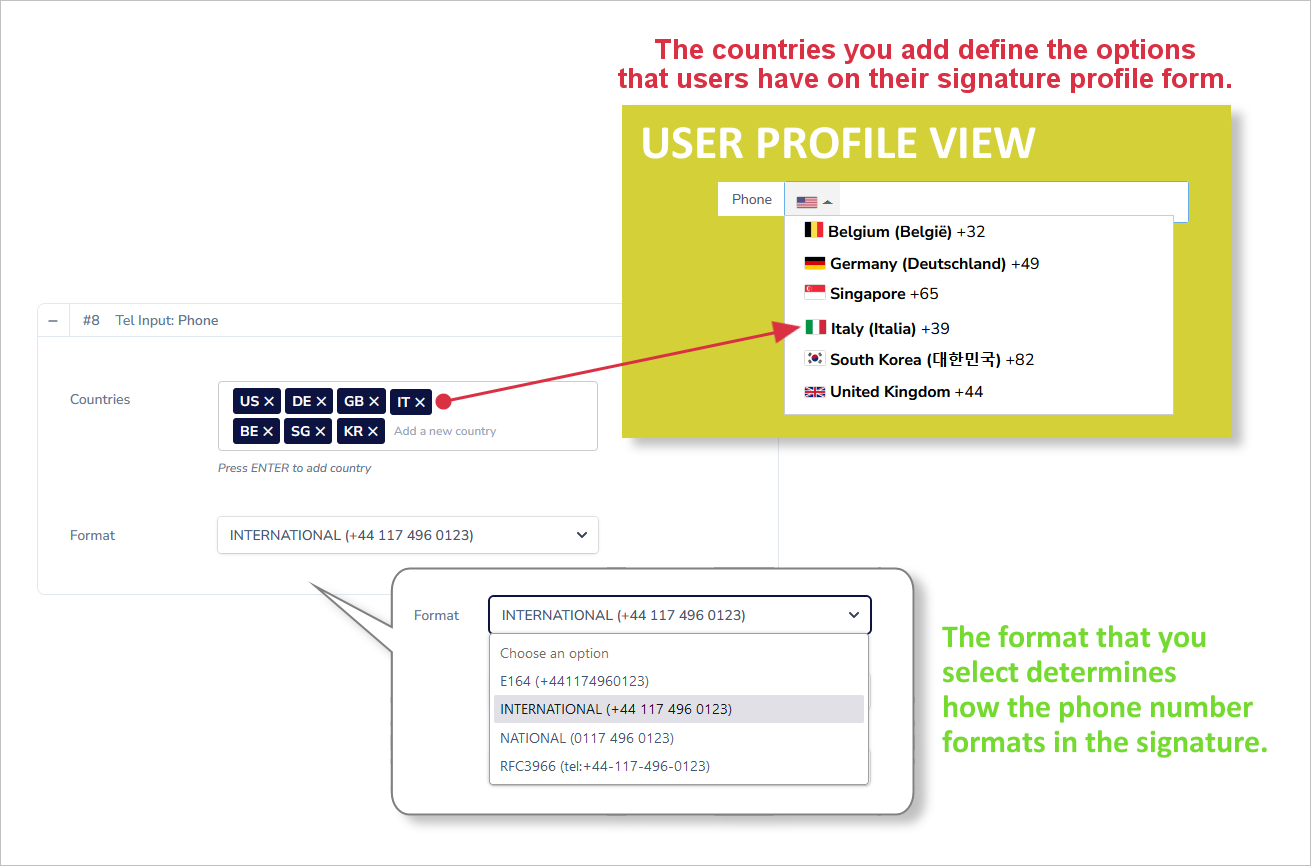
SPECIAL INSTRUCTIONS REGARDING TELEPHONE FIELD COUNTRY CODES: Their are two form settings related to phone numbers that you may want to modify - “countries” and “format”:
Note: A complete list of country codes can be found here. Use the “Alpha-2” codes.
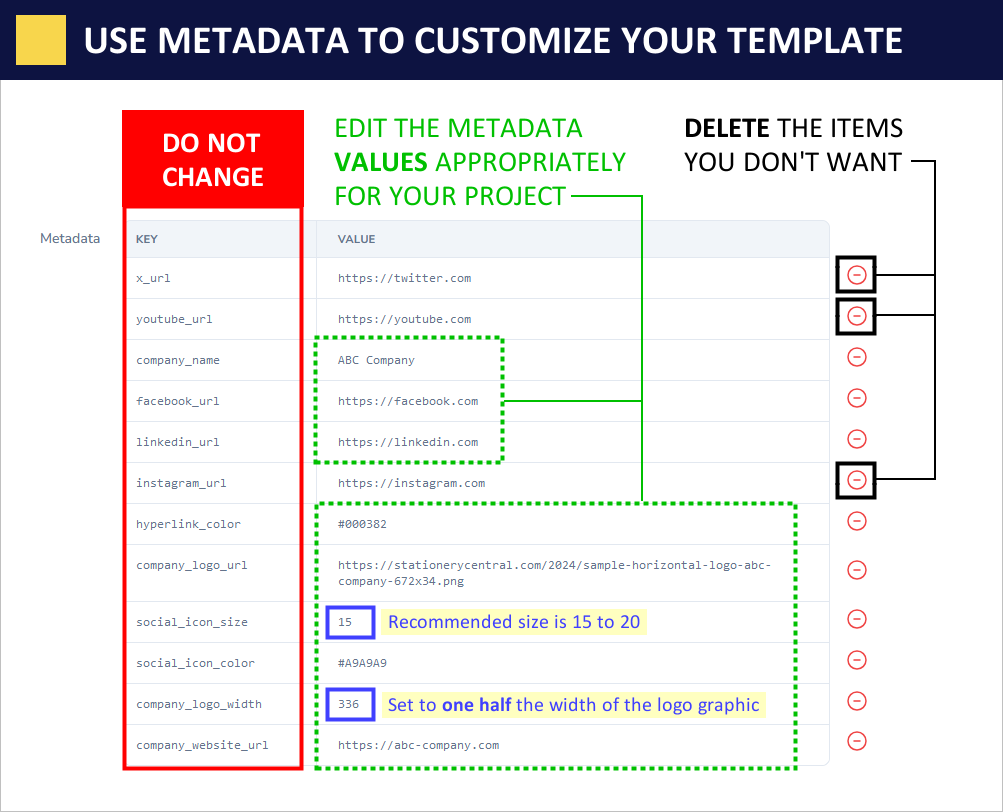
Step 4 - Metadata
Also found on the form editing page is the program’s metadata. Again, this is designed to be pared-down through a process of deletion, as needed.
After deleting the unwanted metadata variables, you’ll need to update the remaining metadata values to configure make the generic template HTML into your own. This is where you’ll make use of the image URL’s you save earlier.
![]()
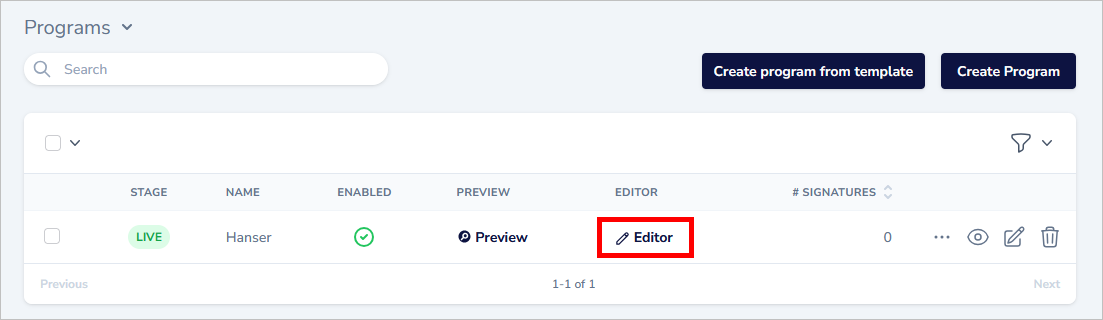
Step 5 - CSS Styling
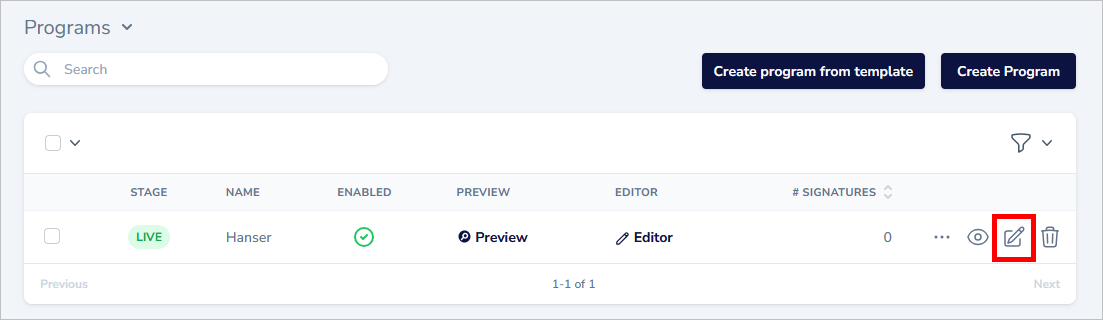
Begin by opening the editor as shown here:
Using the drop-down menu in the upper left, you’ll have access to some of the files that make up your signature program. The three that are generally of most interest are:
- HTML
- Text
- Styles
In this case you’ll want to select “Styles”:
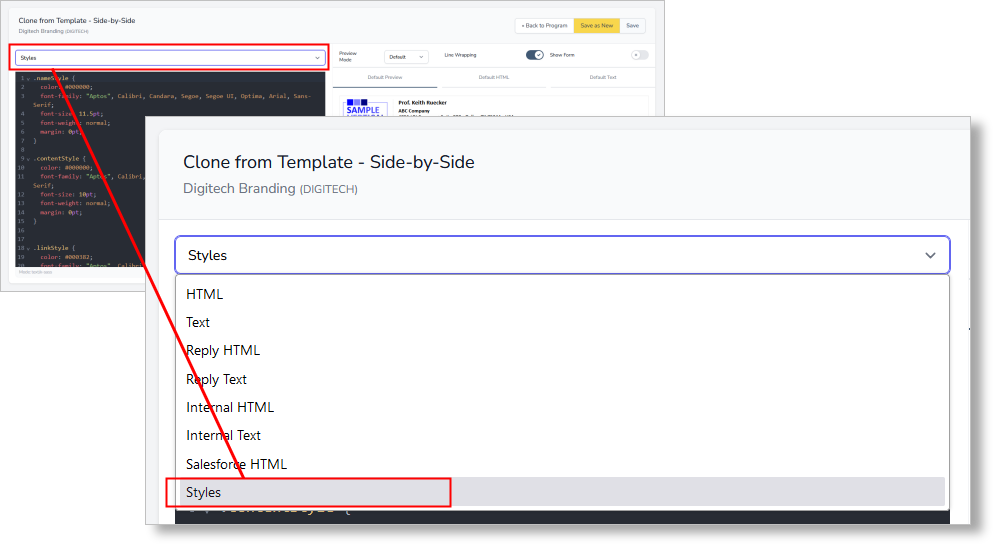
Working from the default layout (shown below), you can modify elements to adjust the font formatting of the signature.
<raw>
.nameStyle {
  color: #000000;
  font-family: "Aptos", Calibri, Candara, Segoe, Segoe UI, Optima, Arial, Sans-Serif;
  font-size: 11.5pt;
  font-weight: normal;
  margin: 0pt;
}

.contentStyle {
  color: #000000;
  font-family: "Aptos", Calibri, Candara, Segoe, Segoe UI, Optima, Arial, Sans-Serif;
  font-size: 10pt;
  font-weight: normal;
  margin: 0pt;
}


.linkStyle {
  color: #000382;
  font-family: "Aptos", Calibri, Candara, Segoe, Segoe UI, Optima, Arial, Sans-Serif;
  font-size: 8pt;
  font-weight: bold;
  margin: 0pt;
}

.confidentialityStyle {
  color: #8A8A8A;
  font-family: "Aptos", Calibri, Candara, Segoe, Segoe UI, Optima, Arial, Sans-Serif;
  font-size: 8pt;
  font-weight: normal;
  margin: 0pt;
}

.text-message p {
  margin-top: 3px;
  margin-bottom: 3px;
}
</endraw>
Step 6 - Create & Attach Locations
There are two parts here.
Part 1: First you must create it, using the LOCATIONS functionality.
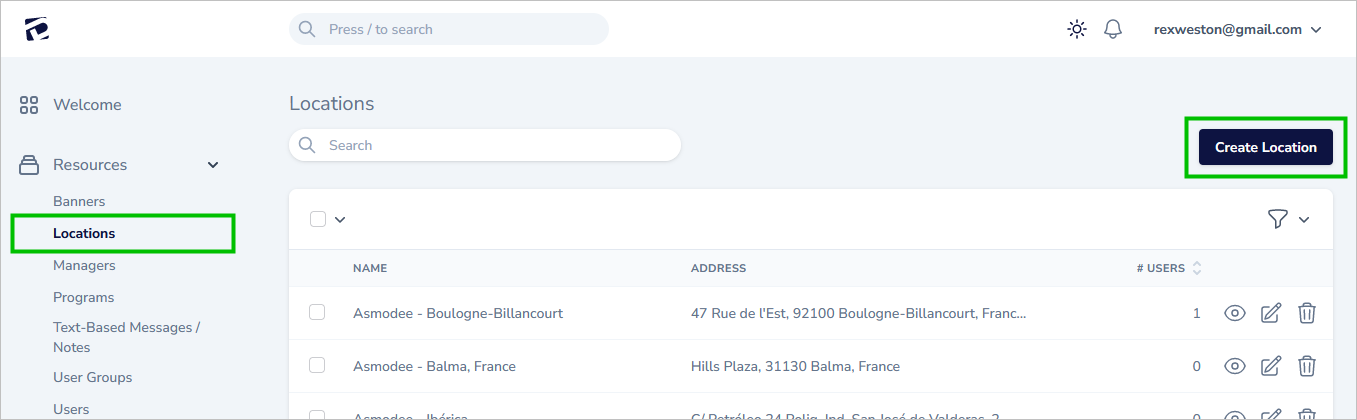
Just follow the process to create the location(s) - it should be self expanatory.
Part 2: Then, after creating your location(s), it (or they) has to be ATTACHED to the correct signature program.
First, view the PROGRAM that you want to attach the location to - “USA” in this example:

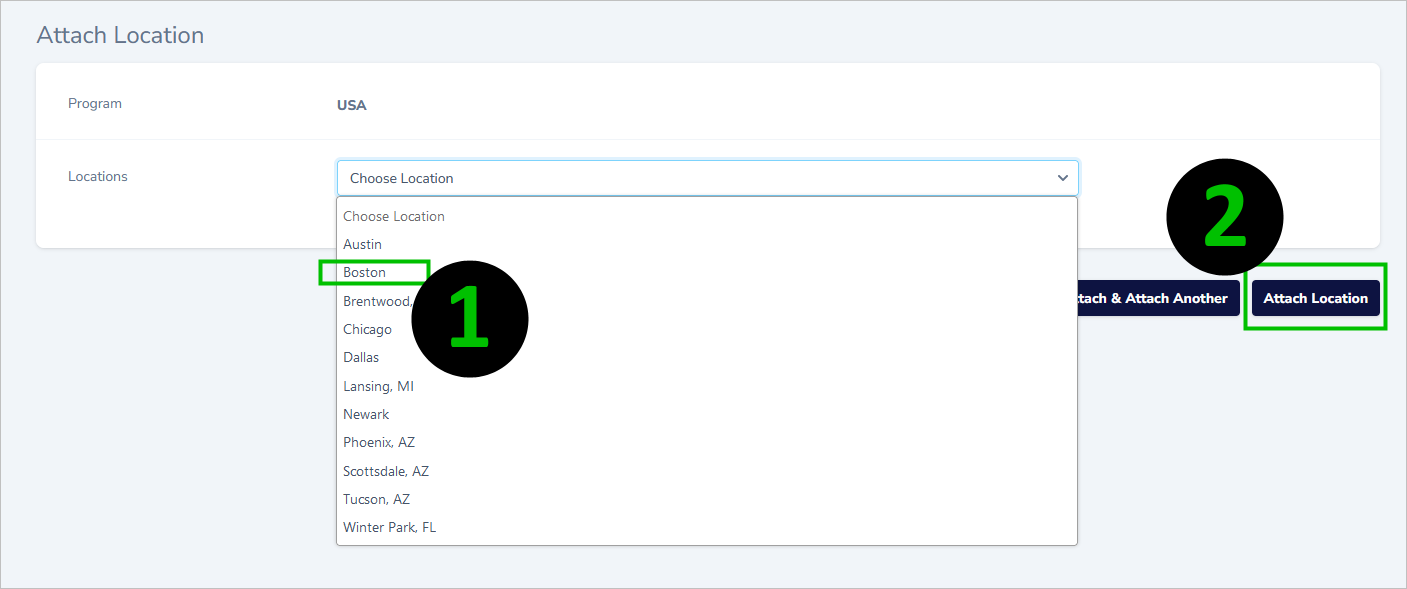
You’ll be on the PROGRAM > DETAILS page, scroll down to the Locations section and click Attach Location:
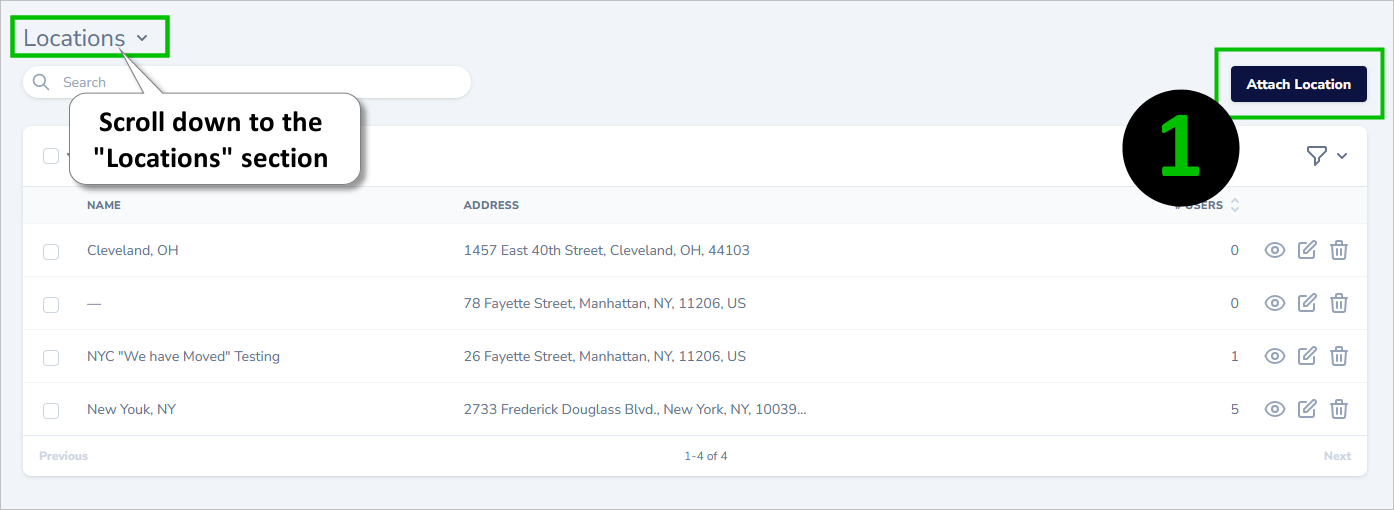
Select the location that you’ve just created, and click Attach Location: