
Program Setup & Forms
In Dynasend, a “program” equates to a cohesive collection of email signature templates. These templates include, at a minimum, an default HTML template and a TXT template, and optionally, reply, internal, and Salesforce templates as well.
The program setup process is relatively straight-forward and infinitely flexible. When setting up a program this is the screen you will see:
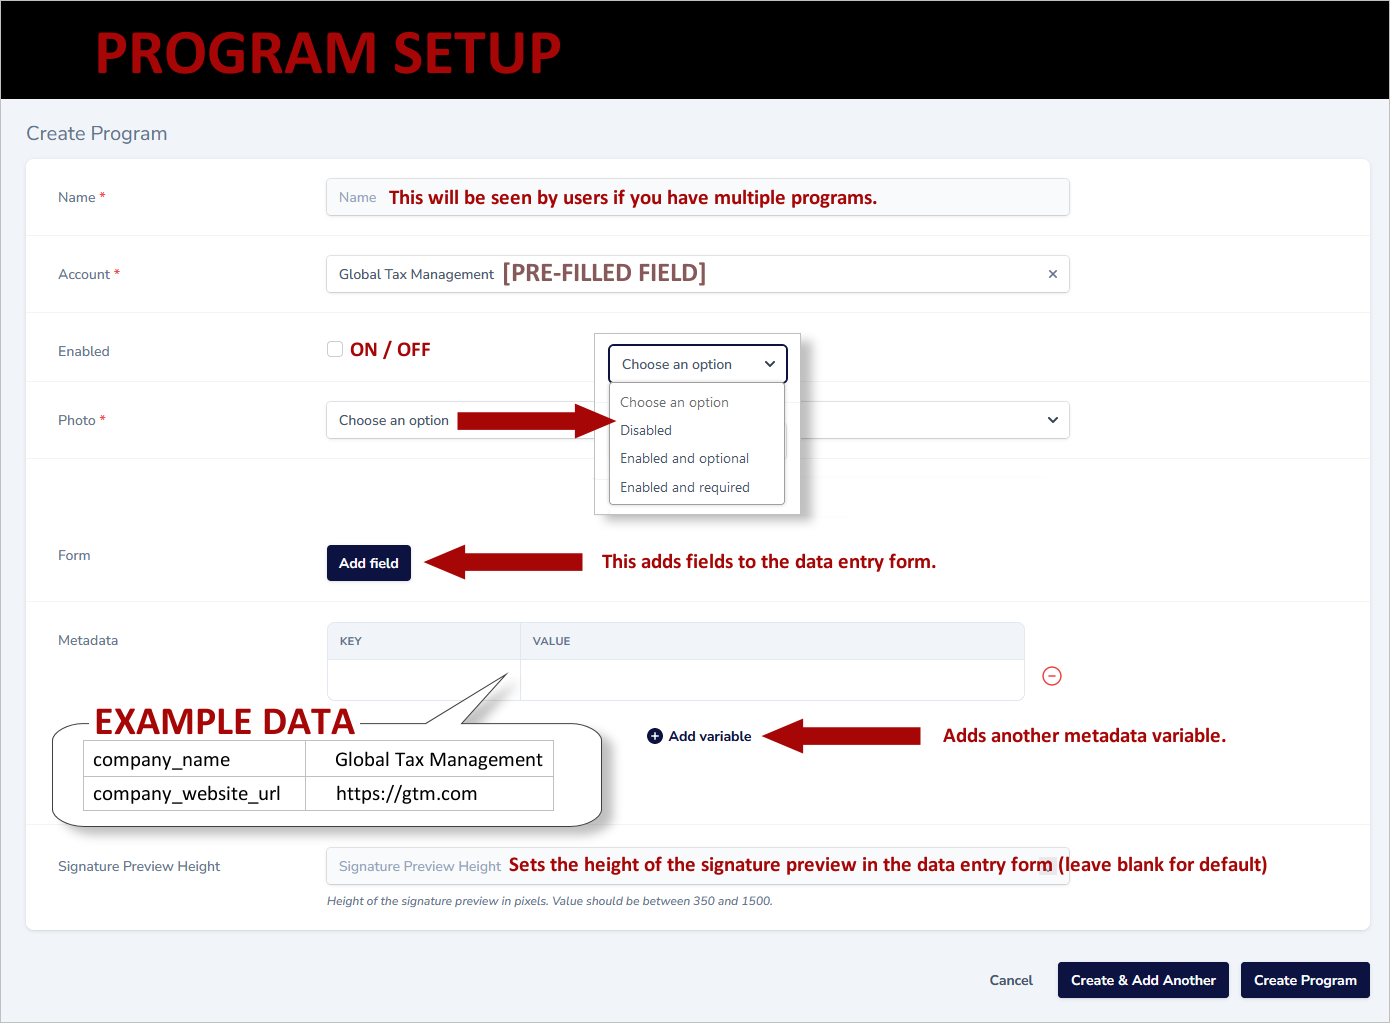
The most important aspect of the program setup is the creation of the template variables and the resulting user-facing signature profile form. This process is triggered by the Add field button in the middle of the programs form.
When you click “Add field” you will be presented with a drop-down asking you what type of field you wish to add. The following graphic illustrates the options and provides representative samples of how the various field types will appear on the user profile form.

After selecting the type of input needed, you’ll be presented with a set of options specific to your particular data field.
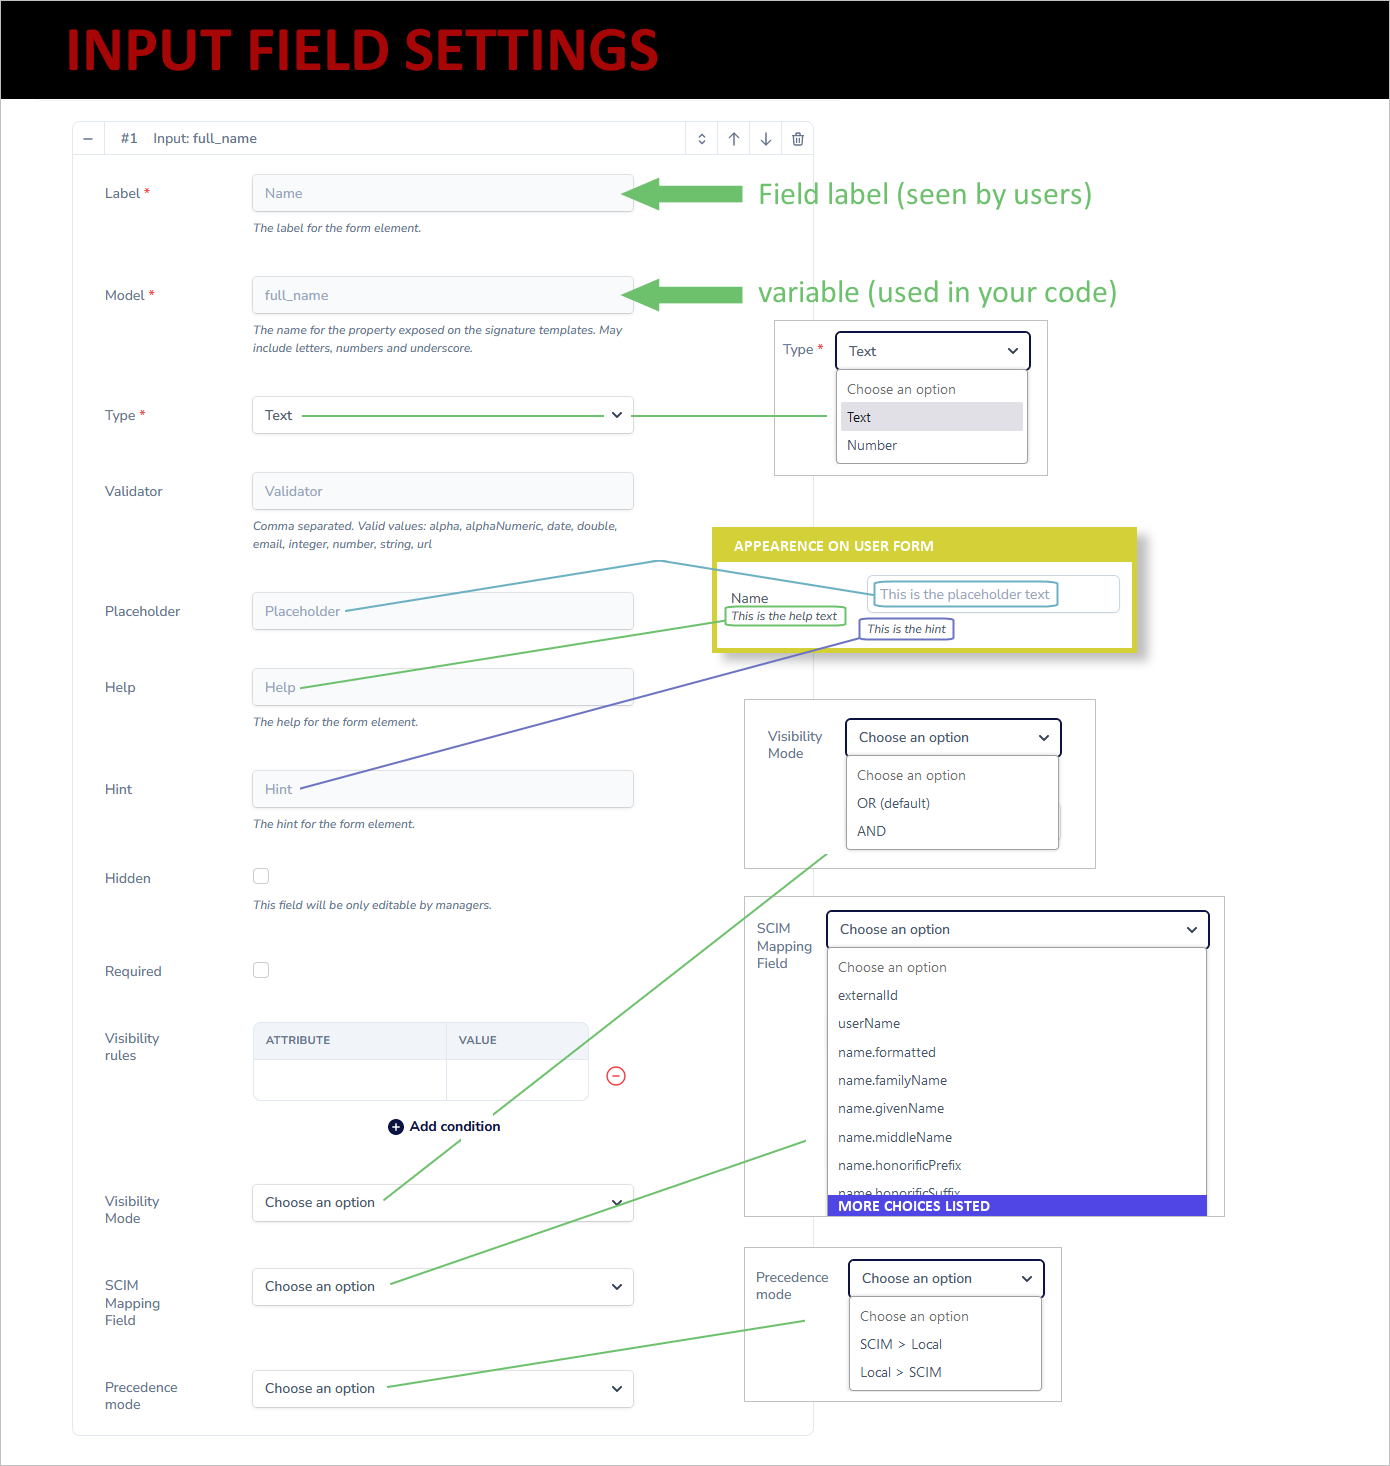
Form Settings - Field Type: Input
Each field type has a series of specific settings that are associated with it.
Following it a more detailed explanation of the settings that are associated with this data type.
1. Label
This is the field label that will appear on the user profile form. You can use HTML font formatting, if needed, to enhance the appearance of the label.
2. Model
This is the variable name that you will use in your email signature templates. It can include letters, numnbers, and underscores. Examples include:
- full_name
- title
- title2
- location
- linkedin_url
3. Type
Options are Text and Number. If you select number, users will be limited to numbers only.
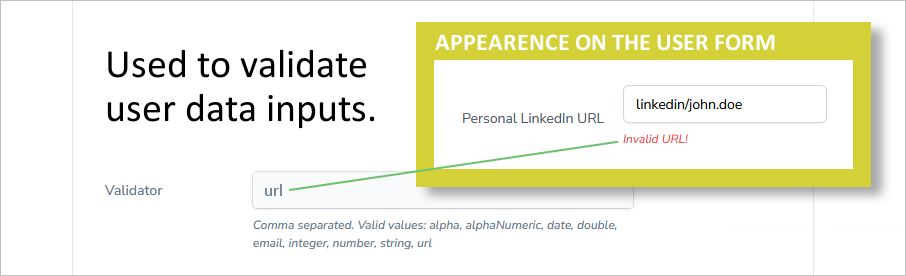
4. Validator
Comma separated. The most useful valid values are
- url
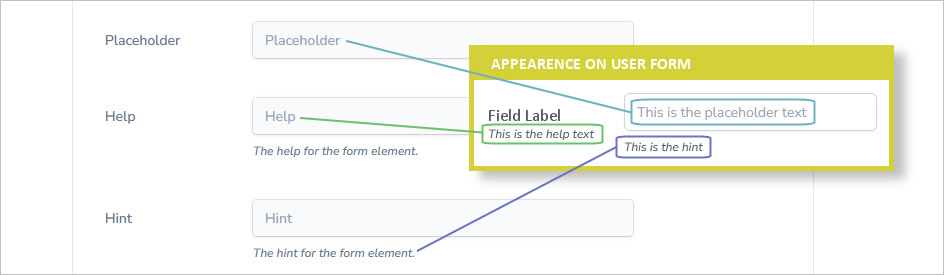
5. Placeholder / Help / Hint
The placeholder, help and hint enable you to add messaging that may be useful to users when completing their profile form:
6. Hidden
This is a setting that hides the input field from users, so when they are accessing the user profile form, to configure their signature, they cannot see the hidden fields. Hidden fields will be accessible by anyone who has been granted “manager” credentials, so these managers can edit this field for the user, as-needed. Use cases include:
- Title, allowing HR (or another signature manager) to set the user’s title, rather than trusting them to list it honestly.
- Awards, toggling on special award badges that are given out only to certain employees.
- One-off features, letting you add a feature for one (or a few) users that doesn’t apply to the larger user base (and hence would only be confusing if exposed on the form).
7. Required
This makes a field required - the user cannot save their profile without completing this field.
8. Visibility Rules
Visibility rules can be used to dynamically control whether or not the user sees the field on the form they are completing. as illustrated here:
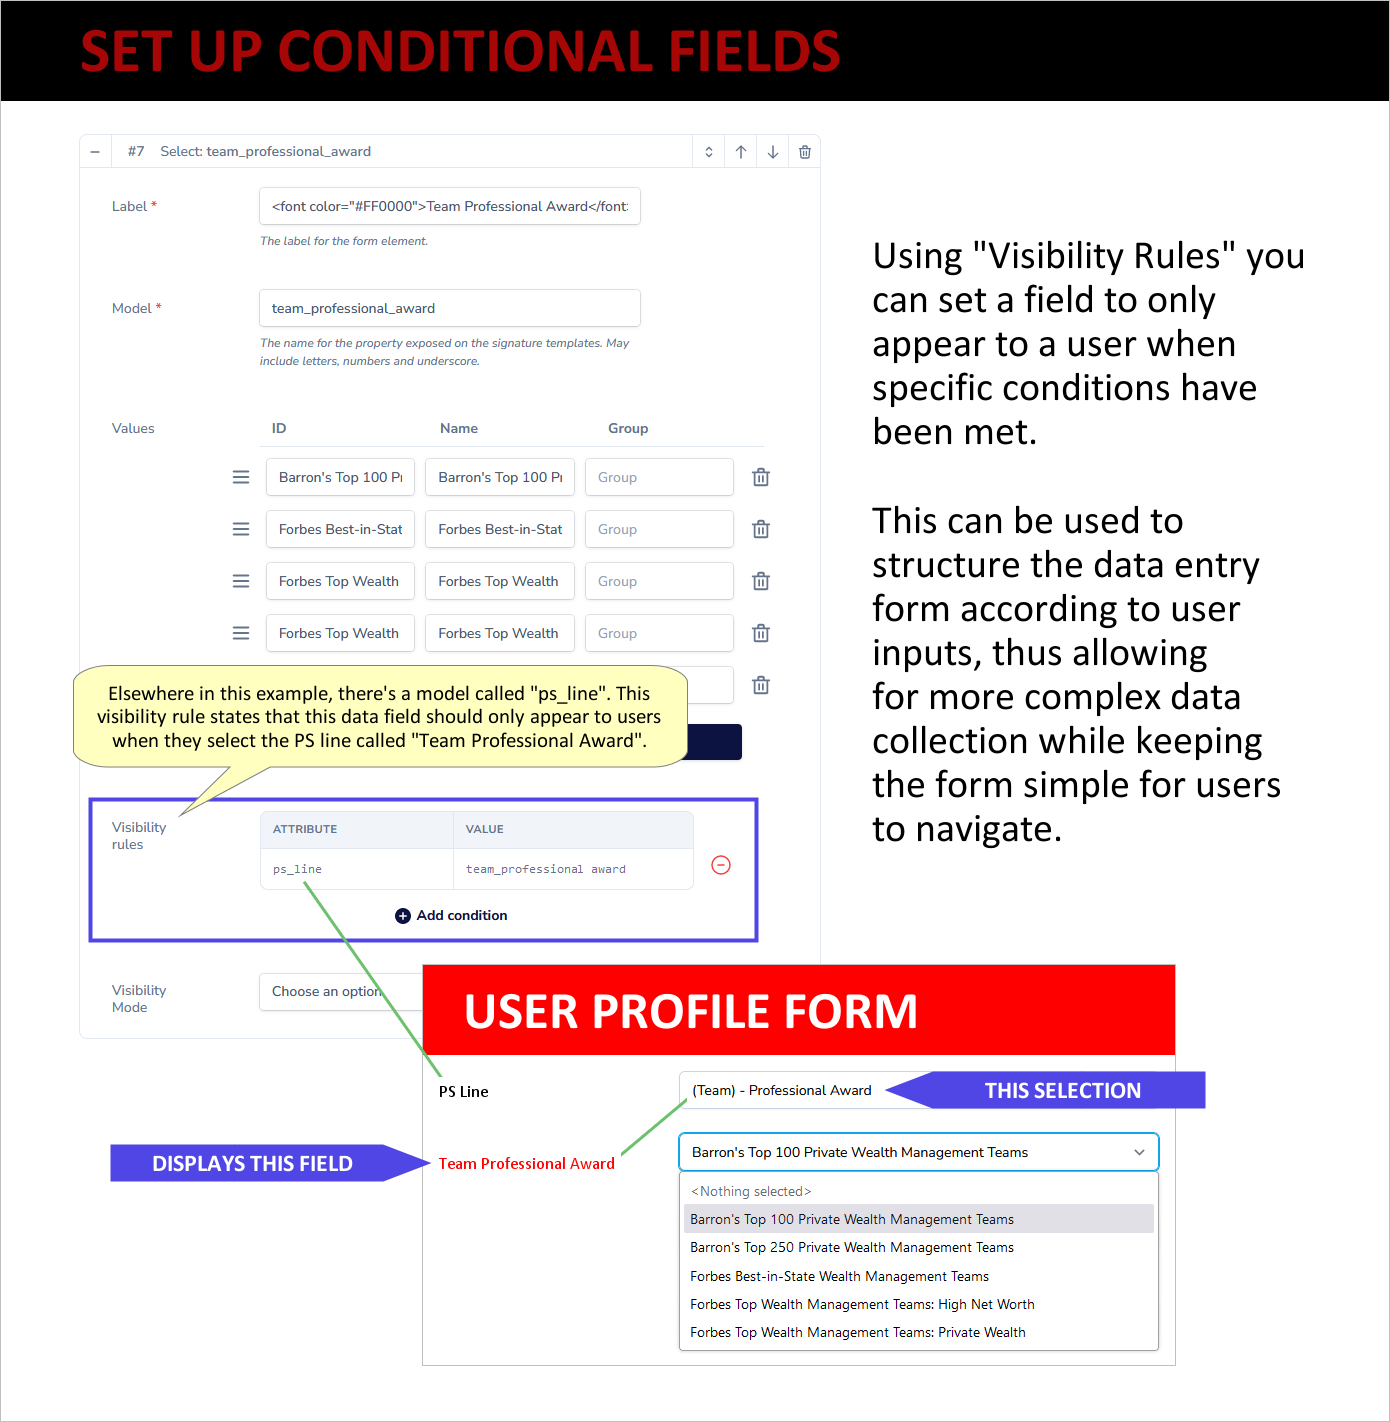
In this case the program offers a PS line that users can add to their signature. There are a number of pre-written options for the PS lines, and some of them have further data choices embedded in them. In this case, the finished PS line looks like:
I'm proud to have been honored as a <selection is inserted from the conditional drop-down> in the past year.
This particular drop-down would not appear to a user if they had selected a different PS line option.
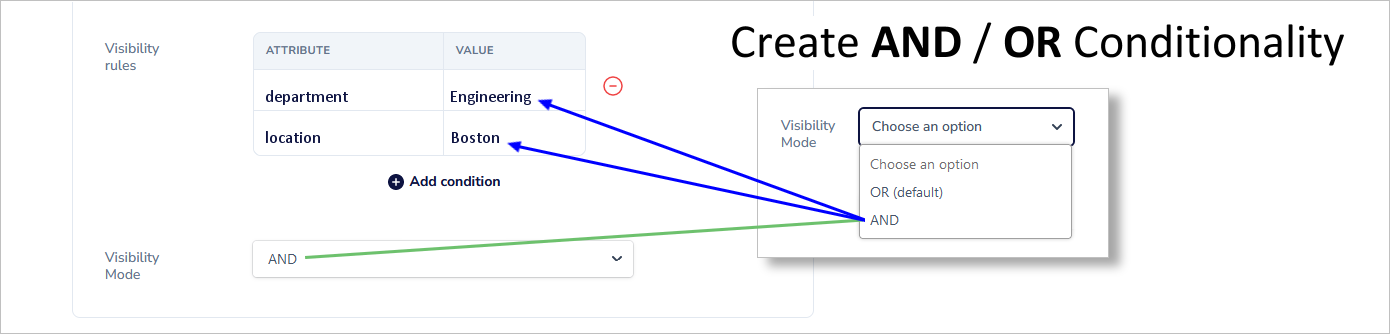
9. Visibility Mode
The visibility mode is used in conjunction with visibility rules, as illustrated here:
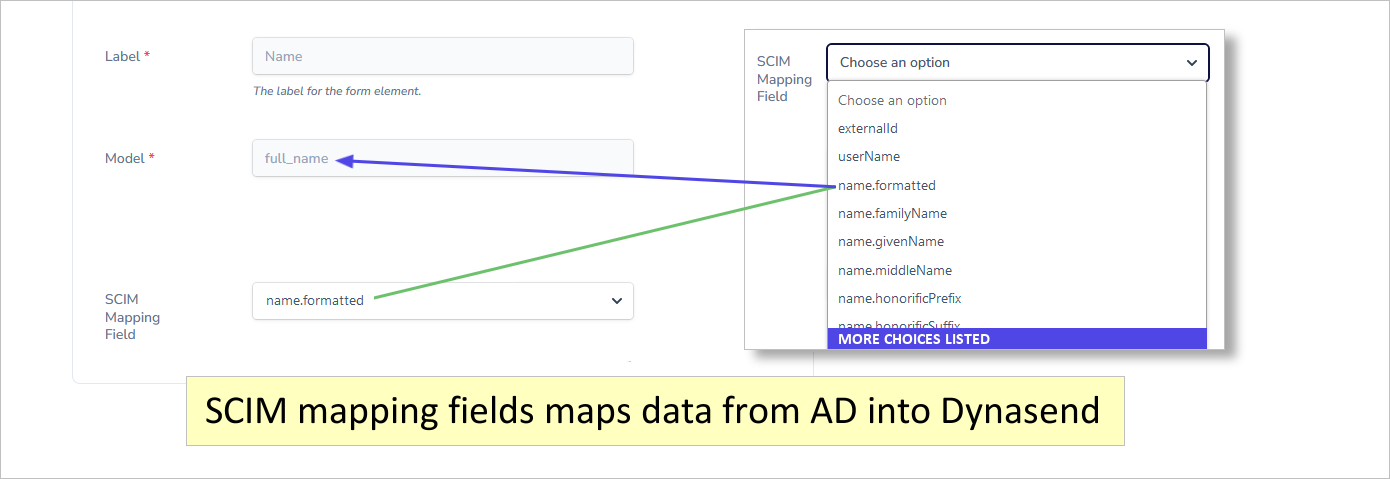
10. SCIM Mapping Field
SCIM mapping allows you to match data from your AD (when that sync has been configured) to the Dynasend database:
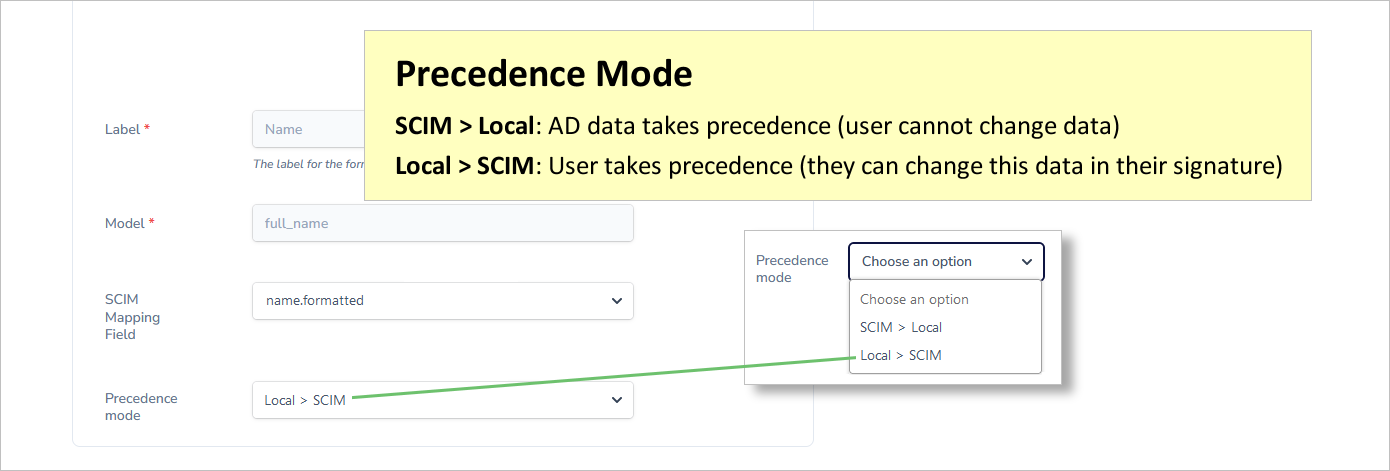
11. Precedence Mode
By setting the precedence mode (when AD sync has been configured) you are able to specify wheter AD will be the “source-of-truth” or whether the users themselves will be the source-of-truth:
Form Settings - Field Type: Checkbox
The form settings for a checkbox are all explained under the section for “Form Type - Input”.
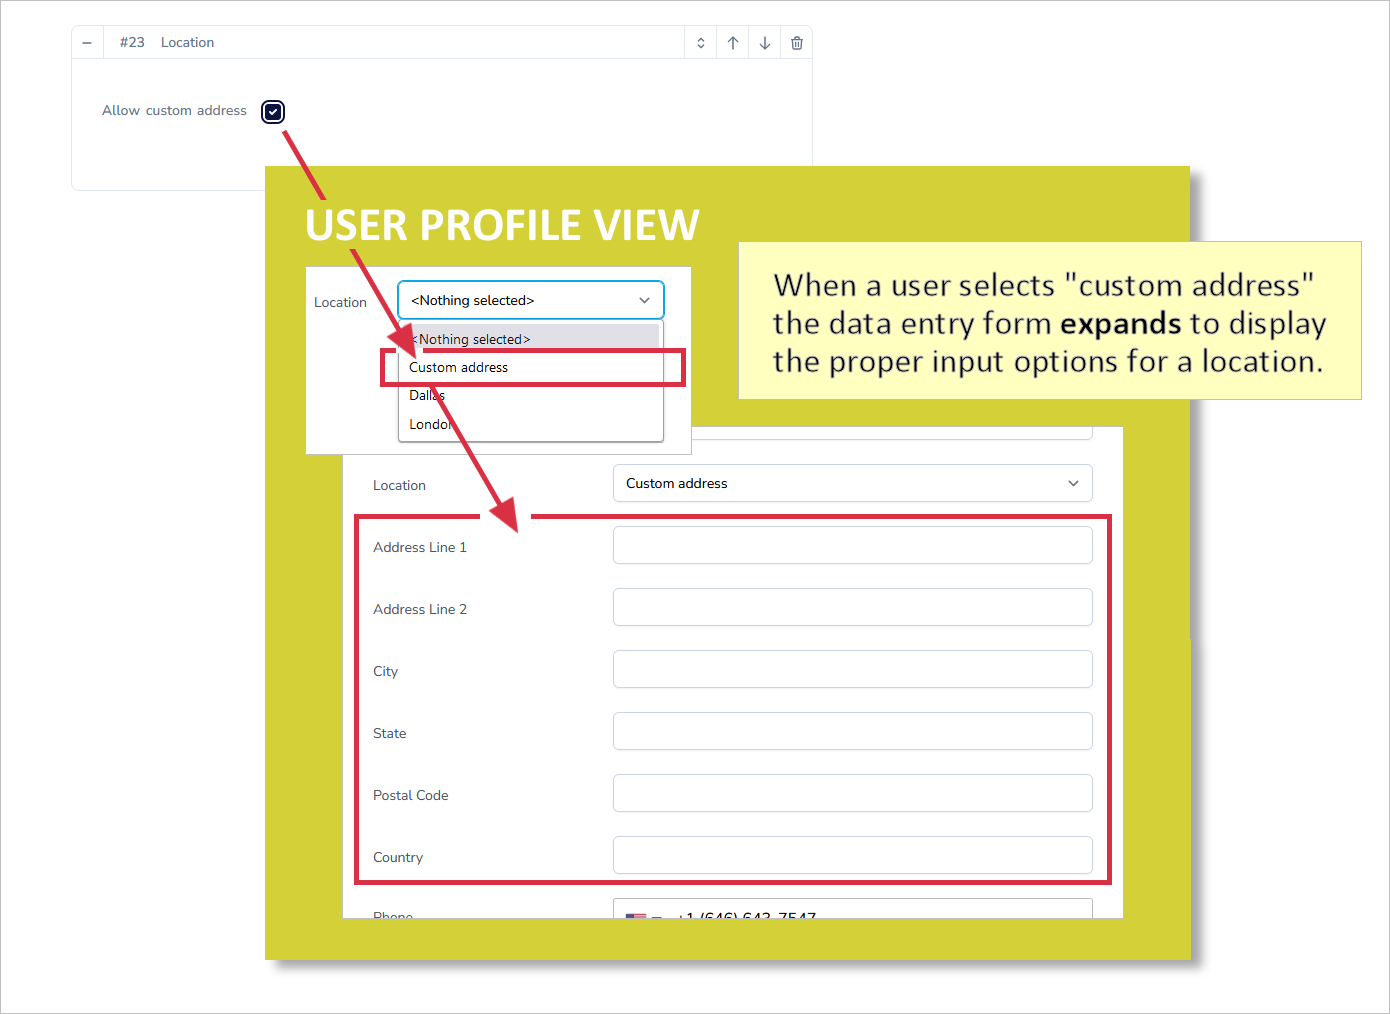
Form Settings - Field Type: Location
Most of the form settings for a location field are explained under the section for “Form Type - Input”. The one form seetting that is unique to a location field is “allow custom address”:
Form Settings - Field Type: Select
Most of the form settings for a location field are explained under the section for “Form Type - Input”. The one form setting that is unique to a location field is “values”:
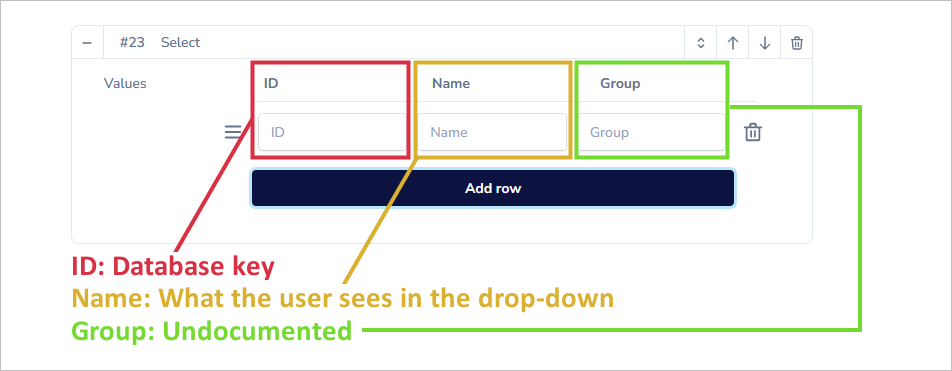
The ID is the database key, so if you change it after you have active users, their selection of this data item will be lost.
The name is what the user will see in the drop-down menu that appears on the data entry form (user profile).
The most appropriate way of utilizing this is to set an ID that you will never change and a NAME that will be useful to users in making the correct selection.
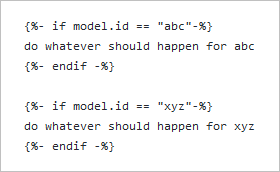
Then, after doing this, you can setup your signature HTML to produce the desired output by using code like:
Form Settings - Field Type: Switch
The form settings for a switch are all explained under the section for “Form Type - Input”.
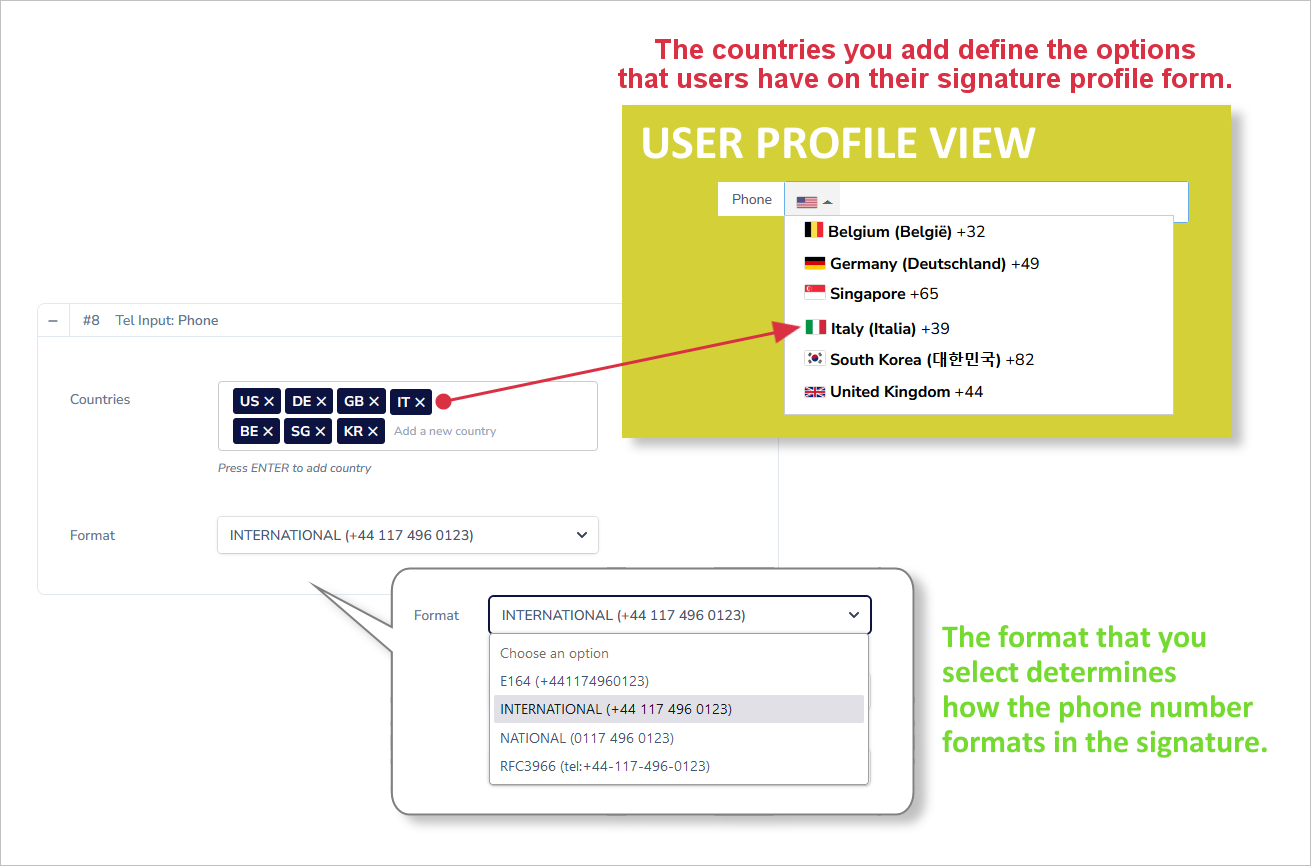
Form Settings - Field Type: Tel Input (telephone)
Most of the form settings for a Tel Input field are explained under the section for “Form Type - Input”. The two form setting that are unique to a Tel Input field are “countries” and “format”:
Note: A complete list of country codes can be found here. Use the “Alpha-2” codes.
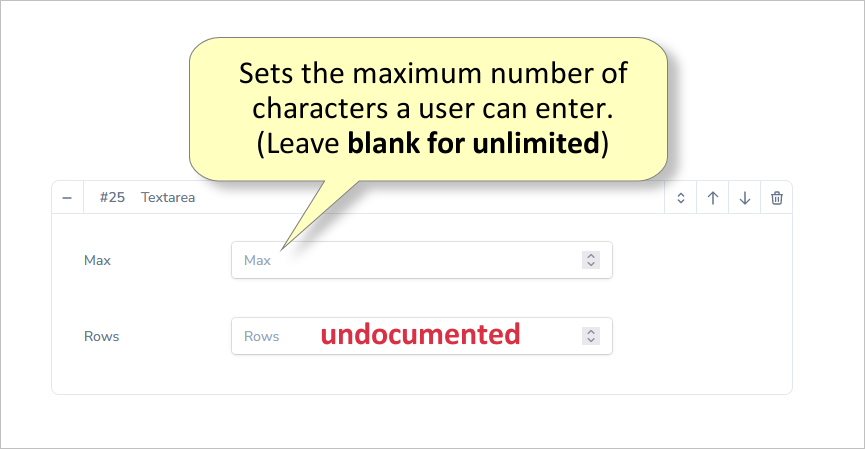
Form Settings - Textarea
Most of the form settings for a Textarea field are explained under the section for “Form Type - Input”. The two form setting that are unique to a Textarea field are “Max” and “Rows”:
Form Settings - Banner Select
The Banner Select field is pretty much automatic - all you need to do is to give it a label.
When a Banner Select field is included in the form users will be able to see all active banners in a drop-down menu and select whichever one they want to have appear in their signature.
Form Settings - Signature Message Select
This is exactly the same as the Banner Select excepty that it gives users access to signature text-based messages/notes, instead of banners.
Form Settings - Upload
The form settings for an uload are all explained under the section for “Form Type - Input”.