Part 1 - Download The Zip File That Contains Your Signature Files and Copy Them to Your Clipboard
Enter the email address you used to create your signature:
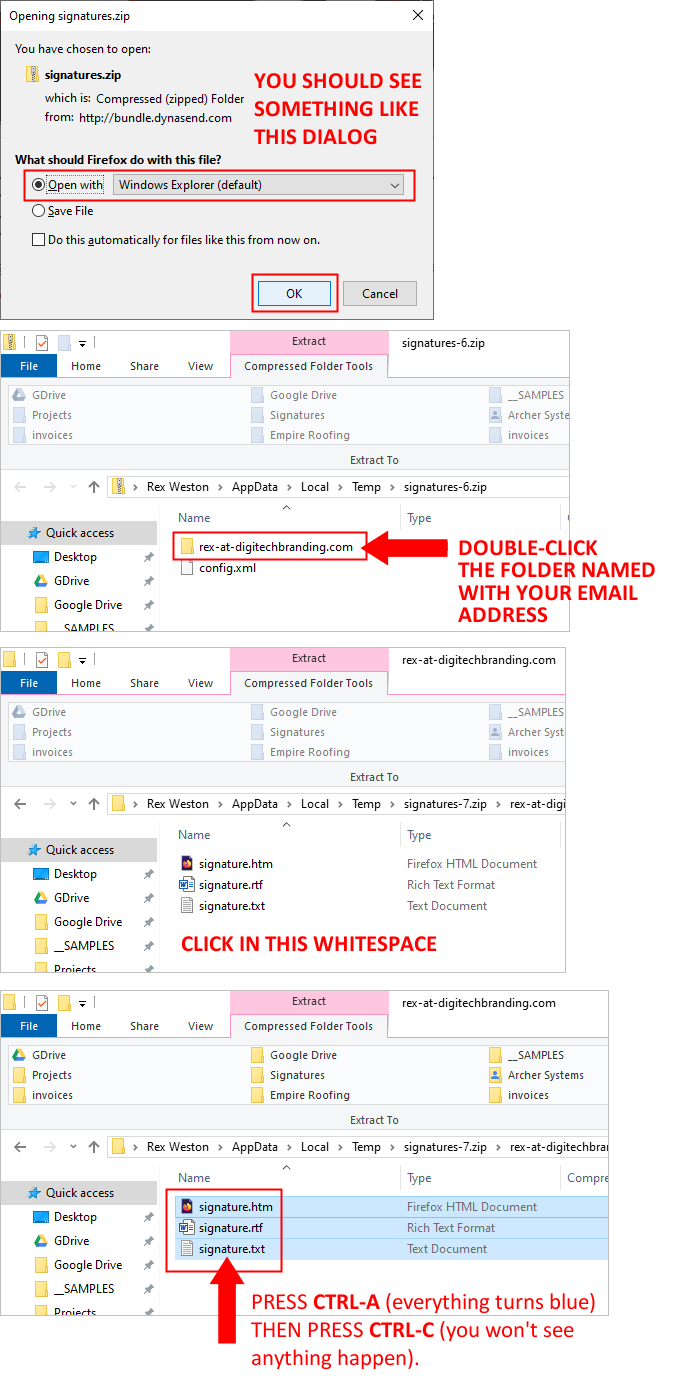
Locate and copy the downloaded files as shown below.
Part 2 - Navigate to the Correct Folder and Paste the Previously Copied Files
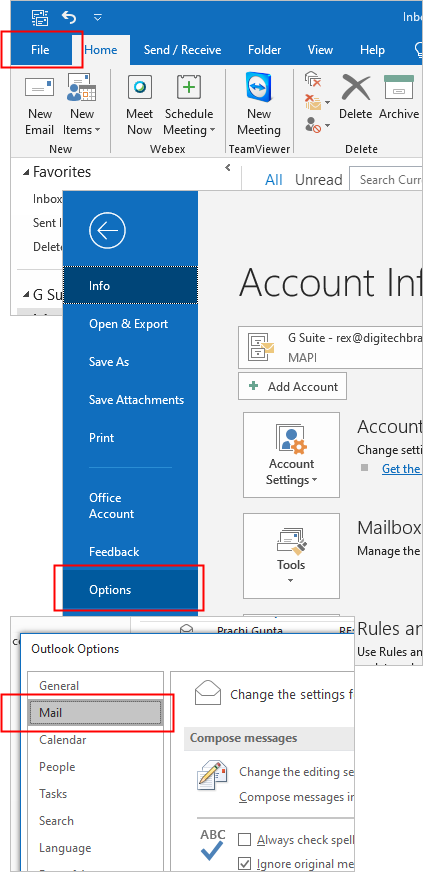
1. With your signature files copied to your clipboard, go into Outlook and navigate ALMOST all the way to your email signature dialog by doing the following:
- from your inbox, click FILE in the upper left corner
- pull down to OPTIONS
- click MAIL in the left column
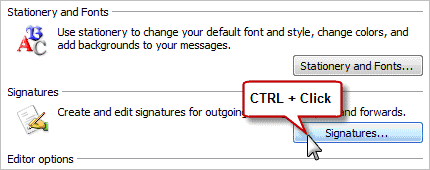
At this point you’ll see the “Signatures” button - HOLD YOUR “CTRL” KEY DOWN AND CLICK THE BUTTON AT THE SAME TIME.
The folder that stores your signatures will open.
2. Press “Ctrl-V” or RIGHT click and choose PASTE to paste your signature files into this folder.
Note: If you see a message saying that the files already exist, go ahead and REPLACE the existing files with these new ones.
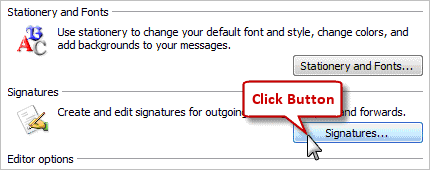
3. Close the signatures folder, and this time just click the “Signatures” button:
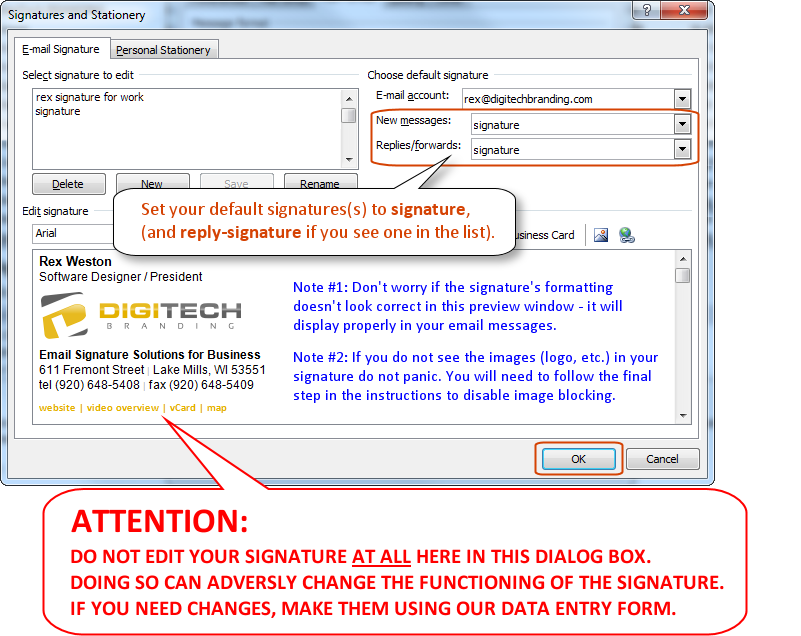
You’ll now see the signature you just saved in your list of existing signatures. Set this signature as your default signature for new messages and for replies, save your settings and exit the signature dialog by clicking “OK”.
Note: If you noticed a signature in your zip file download called “reply- signature” set it for replies (instead of just “signature).
ATTENTION: Do not edit your signature AT ALL in Outlook’s signature editor. Doing so will change the fundamental way that Outlook treats the graphics in your signature, and may result in a poor display of images (blurry and maybe also enlarged). If you need to make changes to your signature, do so using the data entry form set up for your email signature program and then reinstall your signature from scratch.
You’re now finished installing your signature - it should appear properly for new messages and replies.