Office 365 Email Signature Installation Instructions
Note: These instructions are easier than they appear. Follow them step-by-step and you’ll be done in 2 or 3 minutes.
FAQ’s (These may be helpful AFTER installation)
Warning: (Mac Users) The Safari Browser Cannot Be Used
To properly support an HTML email signature, the Safari web browser cannot be used for your signature installation. The formatting will turn out wrong if Safari is used to open and copy the signature. Note that using an alternative browser is temporary. Once the signature has been installed you may return to using Safari as your default browser.
Manual Install - Part 1 - Copying Your Signature to Your Clipboard
Note: If you don’t currently have your signature open in a browser tab, display it now:
In the tab with your signature, press Ctrl-A then Ctrl-C - this will select your entire signature and then copy it to your clipboard.
Note: Mac users will use Command-A and Command-C.
Manual Install - Part 2 - Office 365 - Email Signature Installation
Instructions
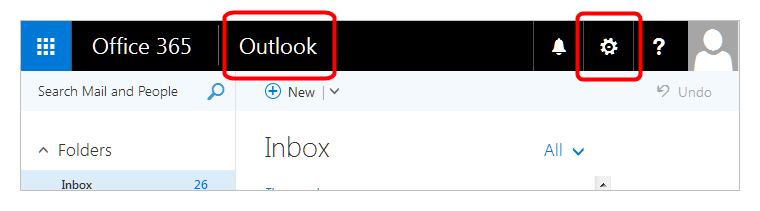
1. Go to Outlook in Office 365 and click the GEAR symbol found in the upper right-hand corner (see below):
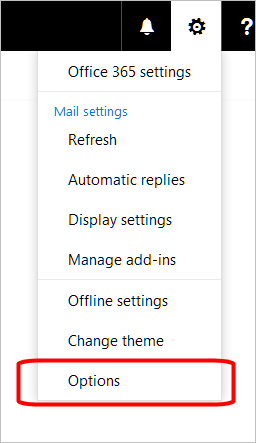
2. Pull down to OPTIONS (see below):
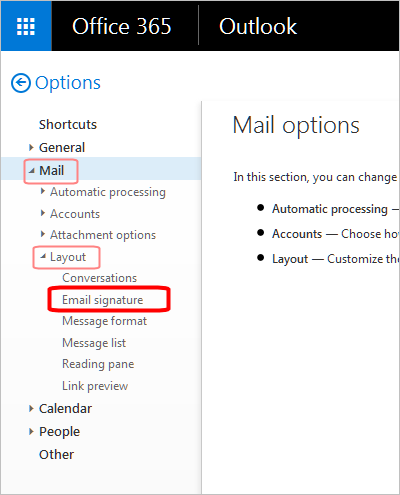
3. Now choose “Email Signature” from the left menu (found under Mail and then Layout):
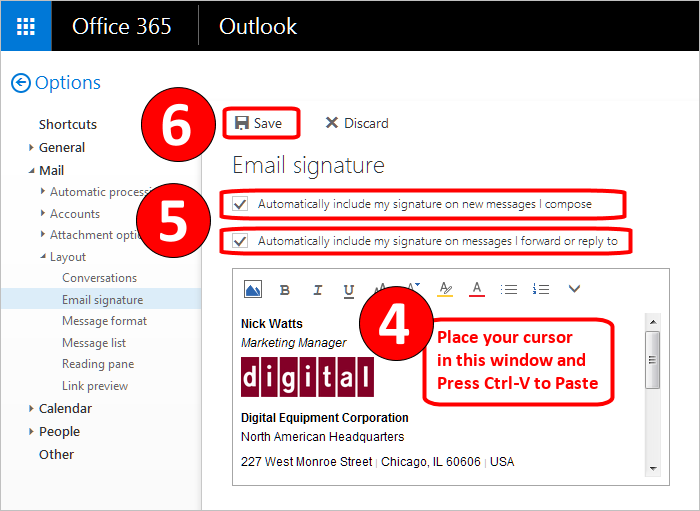
4. This is where you will want to PASTE the signature that you’ve got copied to your computer’s clipboard. Either press CTRL-V to paste it in, or RIGHT CLICK your mouse and choose PASTE - your signature will appear in the signature edit window (see below):
Note: If the signature does not seem to paste in it may be because there is already a signature saved. In this case, press CTRL-A and then press your DELETE key to totally remove any existing signature. Then try to paste it in again, as explained just above.
5. CHECK the boxes that say “Automatically include my signature on new messages I compose” and also the box for reply / forward (see below):
6. Click SAVE at the top (see below):
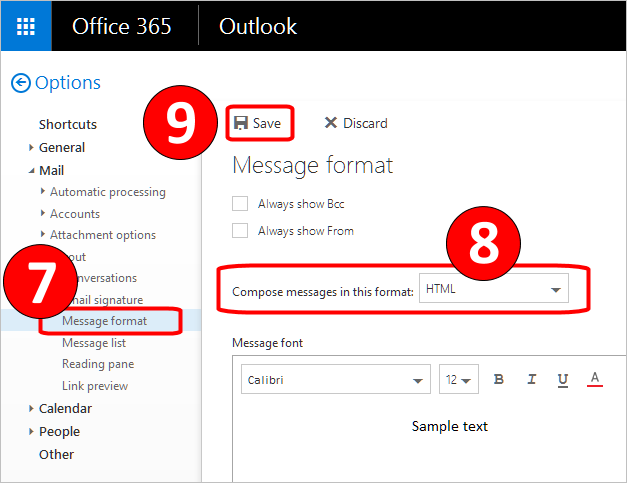
7. Now click the “Message Format” option in the left menu (see below):
8. Make sure that your composing format is set to “HTML” (see below):
9. If you had to change the setting, click SAVE at the top and you’re all done (Note: If the setting was already on “HTML” then you do not need to save) :
The next time you go to compose a message (or reply to one) your signature or business card will automatically appear.
Note: Hyperlinks in email never work while you are composing or responding to a message. To test your links, compose a message to yourself, and try the links when you have received it and are reading it.