Quick Start Step 5 - CSS Styling
Begin by opening the editor as shown here:

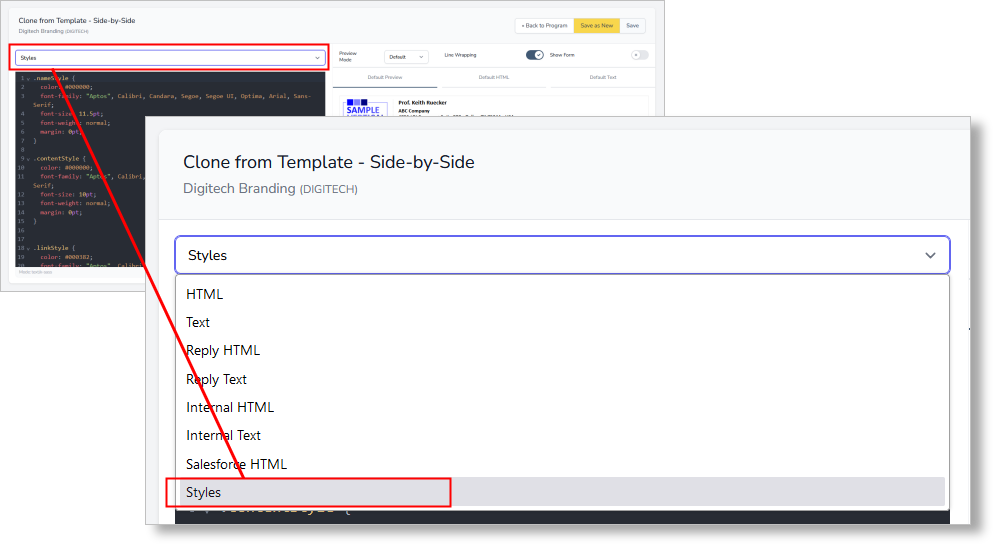
Using the drop-down menu in the upper left, you’ll have access to some of the files that make up your signature program. The three that are generally of most interest are:
- HTML
- Text
- Styles
In this case you’ll want to select “Styles”:

Working from the default layout (shown below), you can modify elements to adjust the font formatting of the signature.
<raw>
.nameStyle {
  color: #000000;
  font-family: "Aptos", Calibri, Candara, Segoe, Segoe UI, Optima, Arial, Sans-Serif;
  font-size: 11.5pt;
  font-weight: normal;
  margin: 0pt;
}

.contentStyle {
  color: #000000;
  font-family: "Aptos", Calibri, Candara, Segoe, Segoe UI, Optima, Arial, Sans-Serif;
  font-size: 10pt;
  font-weight: normal;
  margin: 0pt;
}


.linkStyle {
  color: #000382;
  font-family: "Aptos", Calibri, Candara, Segoe, Segoe UI, Optima, Arial, Sans-Serif;
  font-size: 8pt;
  font-weight: bold;
  margin: 0pt;
}

.confidentialityStyle {
  color: #8A8A8A;
  font-family: "Aptos", Calibri, Candara, Segoe, Segoe UI, Optima, Arial, Sans-Serif;
  font-size: 8pt;
  font-weight: normal;
  margin: 0pt;
}

.text-message p {
  margin-top: 3px;
  margin-bottom: 3px;
}
</endraw>
You’re now ready to proceed to step six.