Office 365 Email Signature Installation Instructions
Manual Install - Part 1 - Copying Your Signature to Your Clipboard
Note: If you don’t currently have your signature open in a browser tab, display it now:
In the tab with your signature, press Ctrl-A then Ctrl-C - this will select your entire signature and then copy it to your clipboard.
Note: Mac users will use Command-A and Command-C.
Manual Install - Part 2 - Office 365 - Email Signature Installation Instructions
1. Go to Outlook in Office 365 and click the GEAR symbol found in the upper right-hand corner (see below):

2. Click “View all Outlook Settings” at the bottom (see below):
![]()
3. Now follow the six steps (shown below) in order and you’ll be finished:
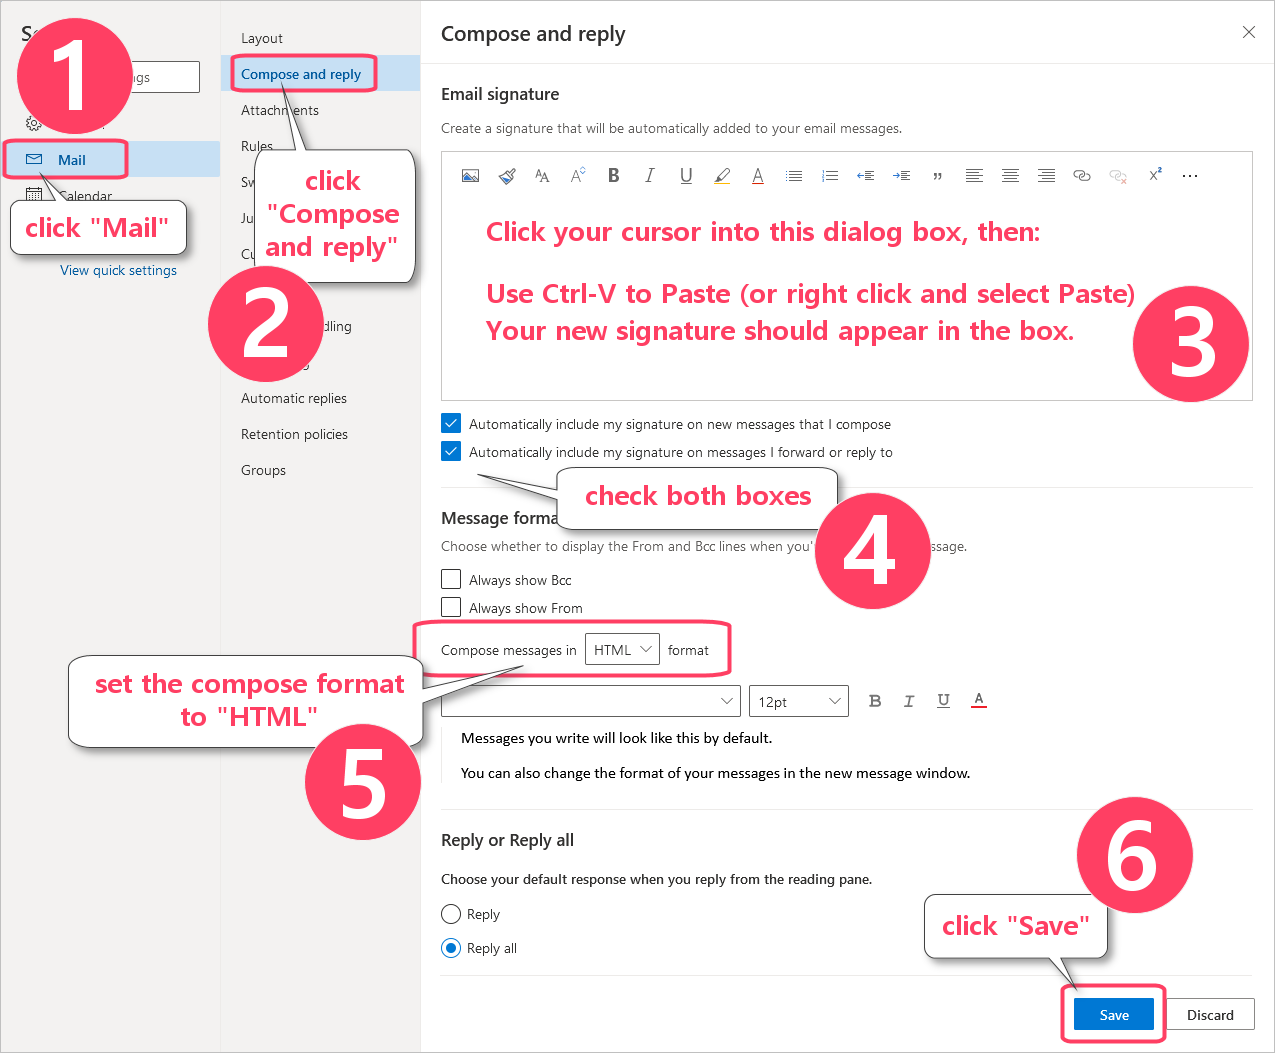
The next time you go to compose a message (or reply to one) your signature or business card will automatically appear.
Note: Hyperlinks in email never work while you are composing or responding to a message. To test your links, compose a message to yourself, and try the links when you have received it and are reading it.